An Easy DIY Piñata for Cinco De Mayo

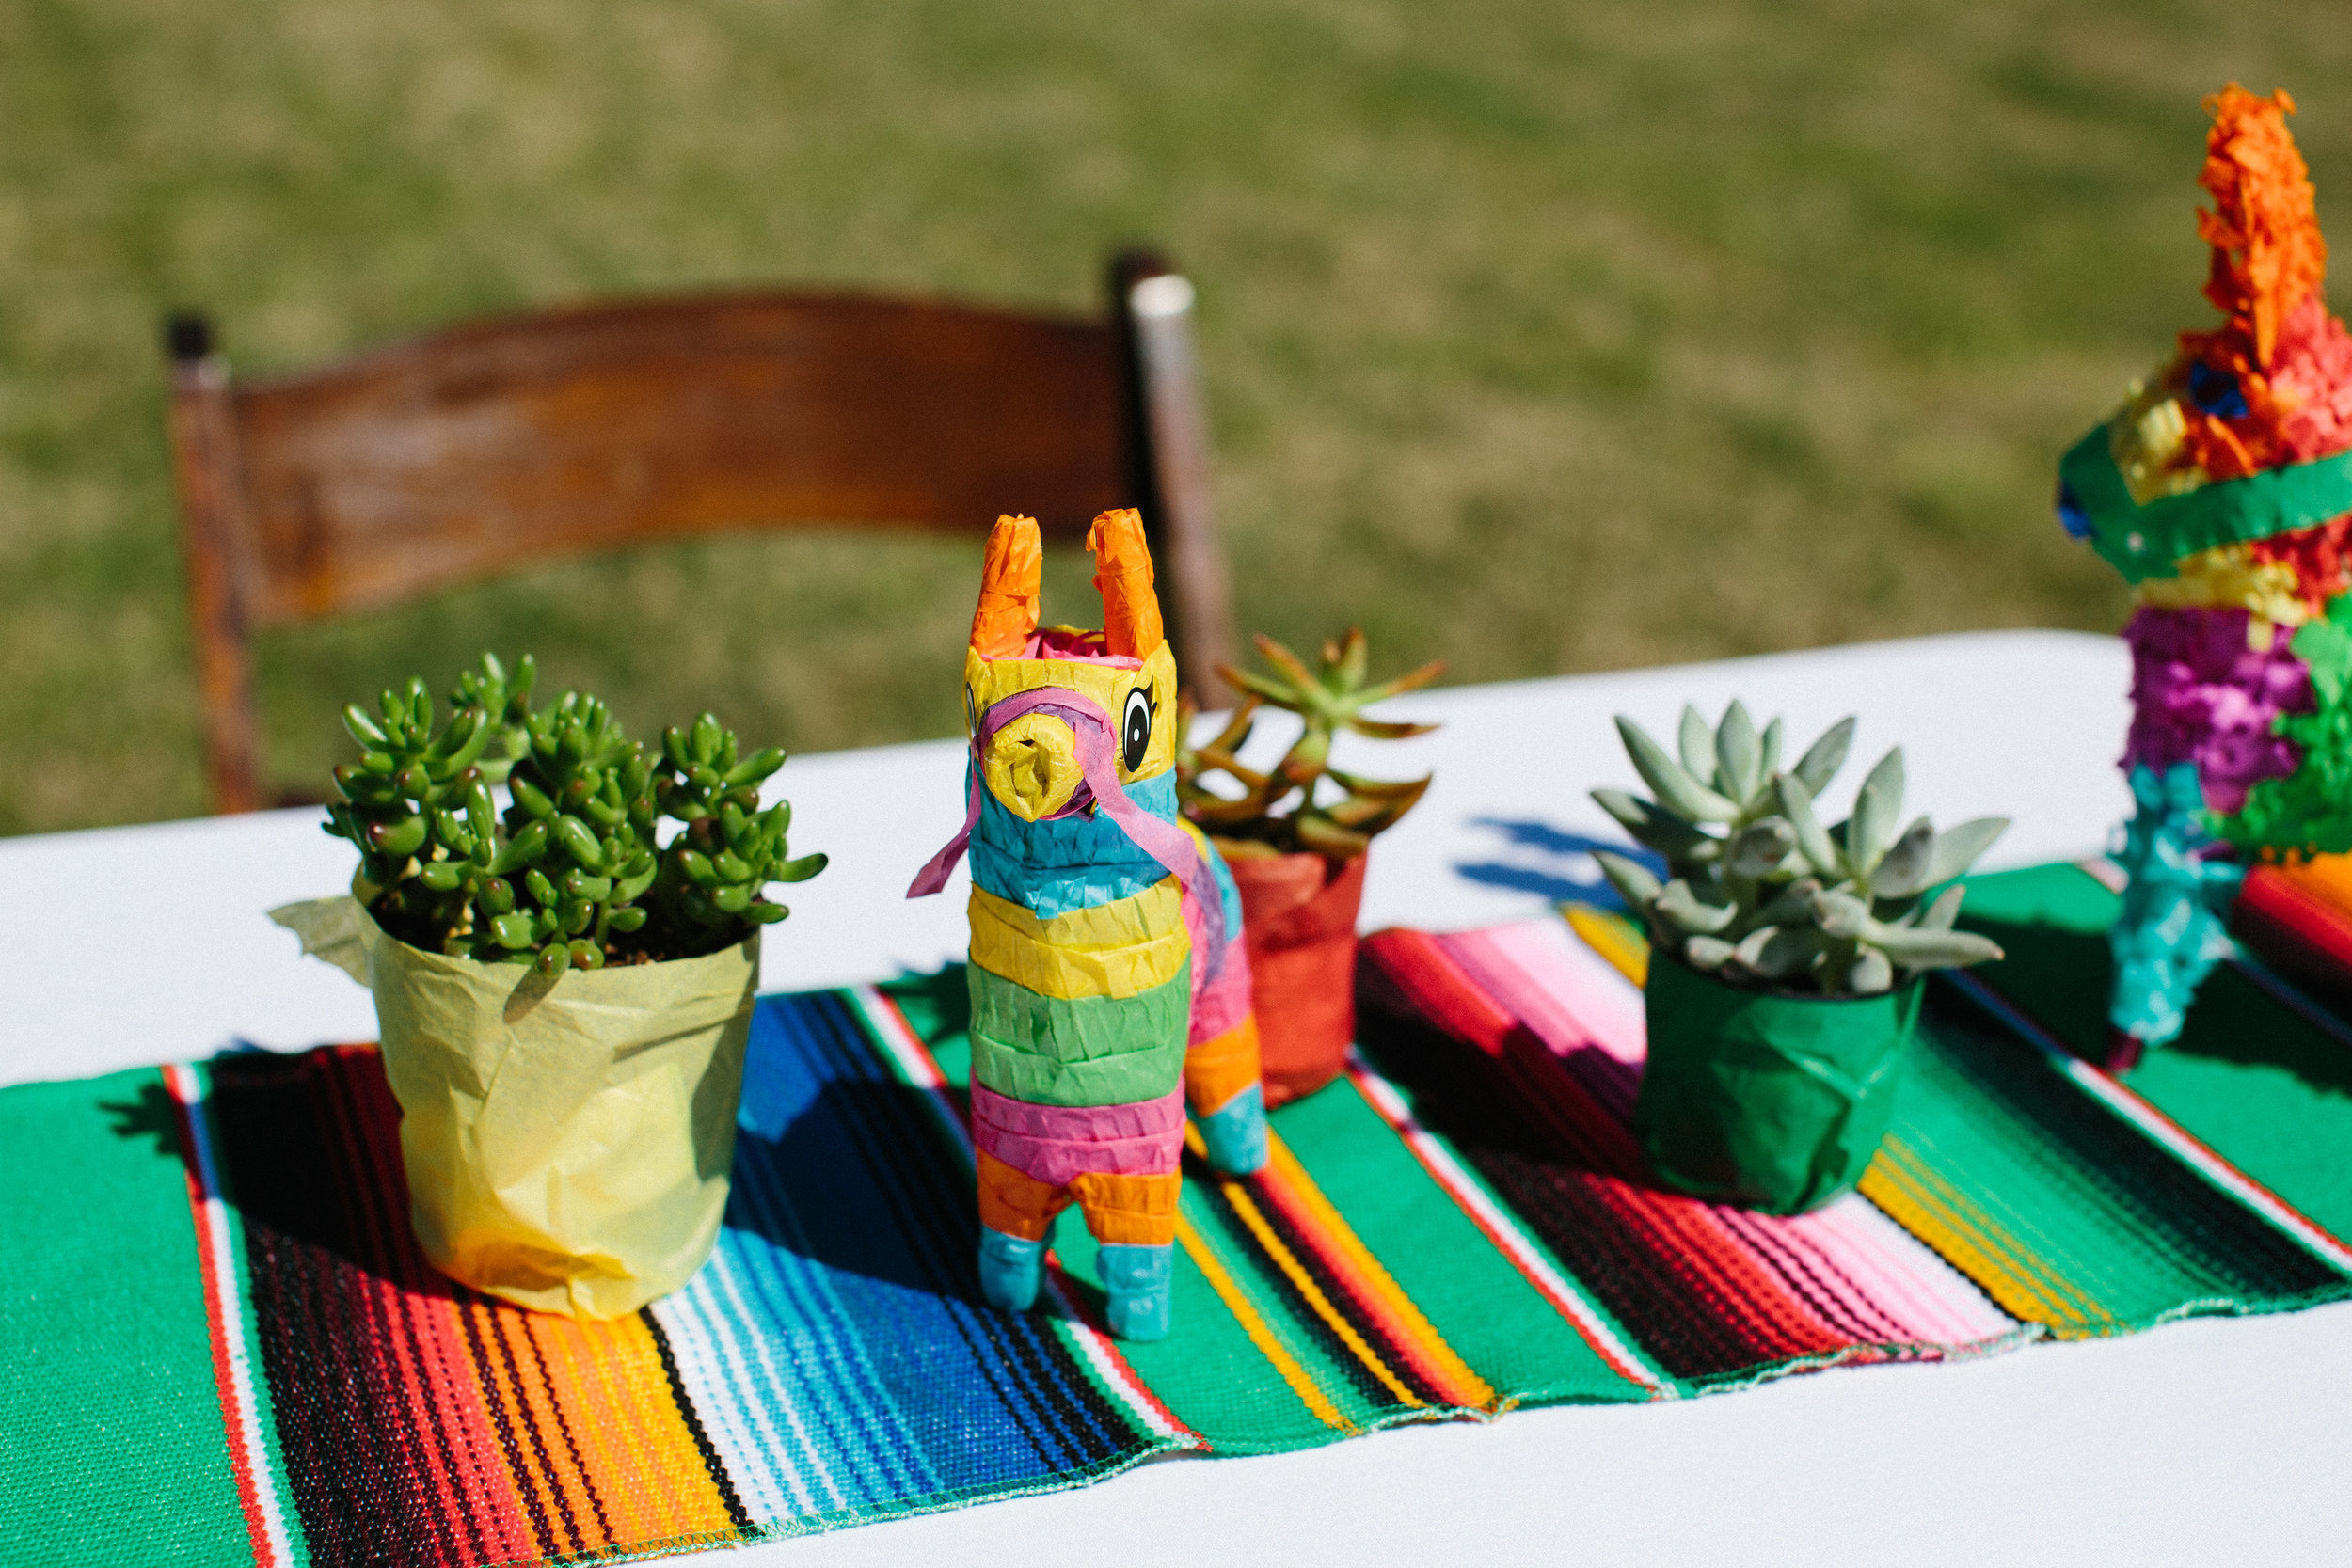
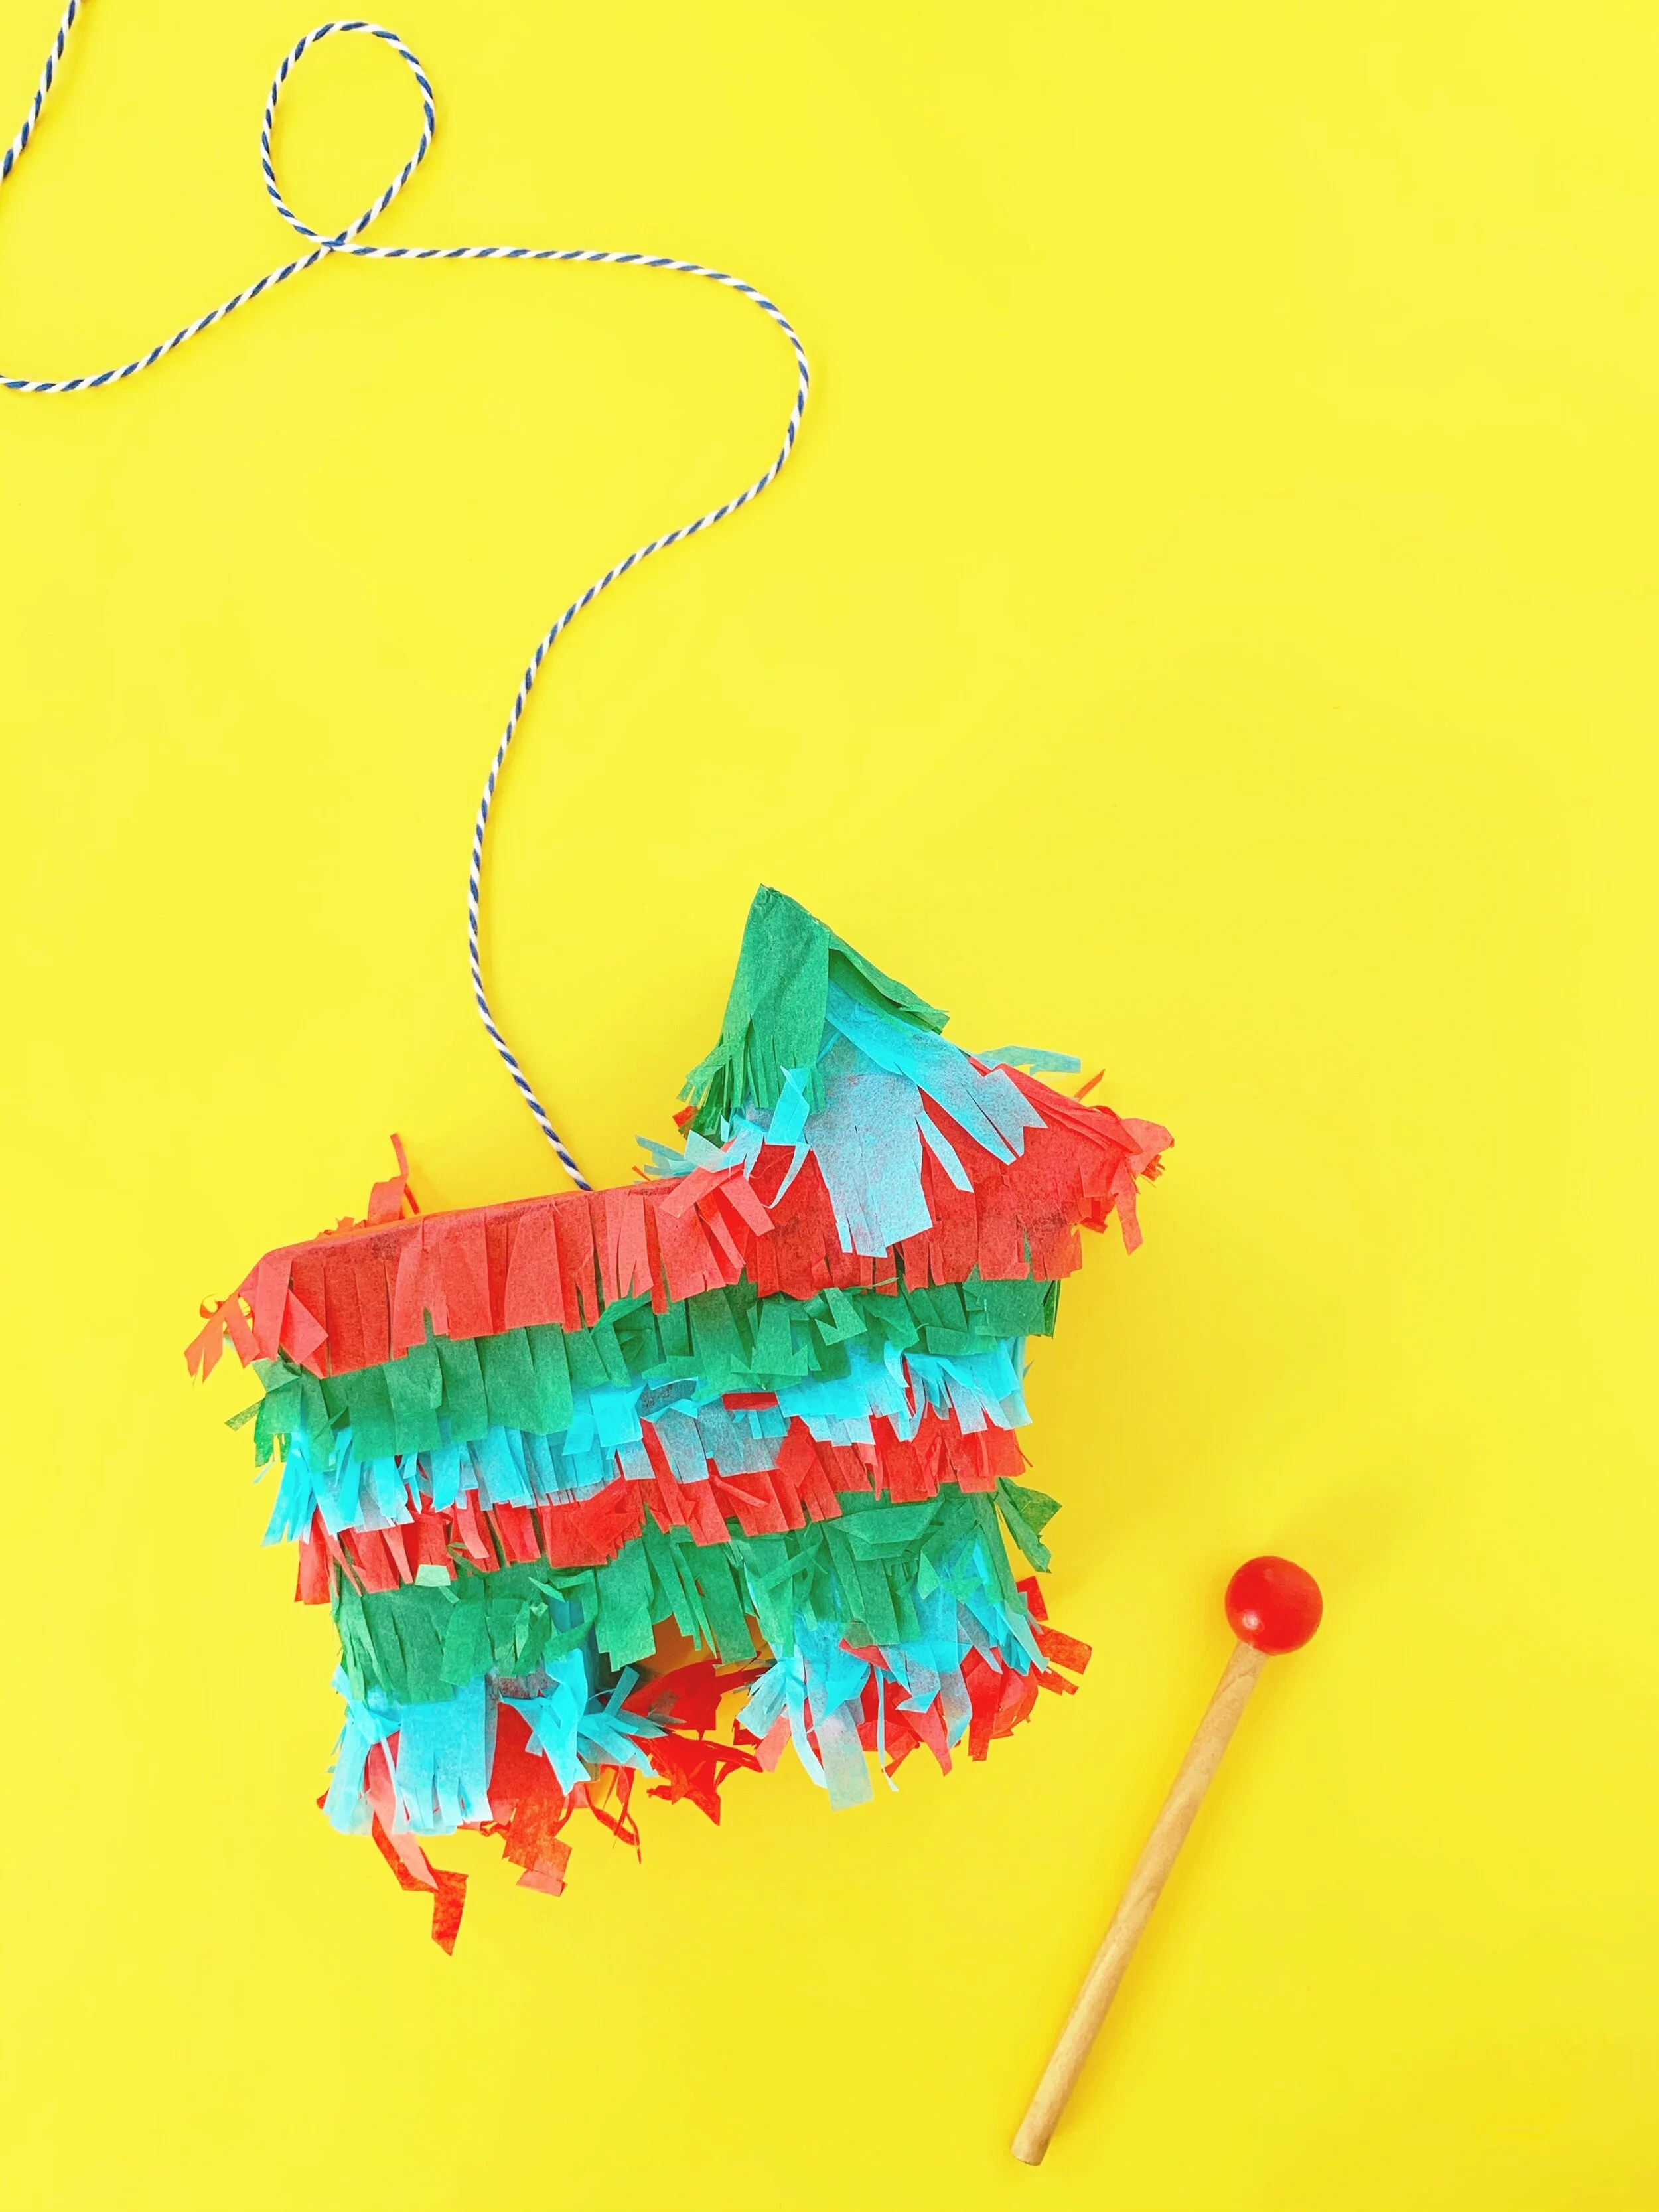
I love a good DIY! And I love a good craft for a theme party! So, with Cinco De Mayo less than a week away, I thought I’d share this super easy DIY piñata craft!

DIY Pinata Craft for Cinco De Mayo

Supplies:
- Cardboard box. Use your left over Amazon boxes, cereal boxes … any sort of cardboard box
- Scissors and a box cutter, for cutting and trimming the cardboard boxes
- Marker or pen
- Glue stick
- Tape or glue gun
- Tissue Paper
- Scissors or Fringe scissors for creating the fringe out of tissue paper

IMG_4533.JPG

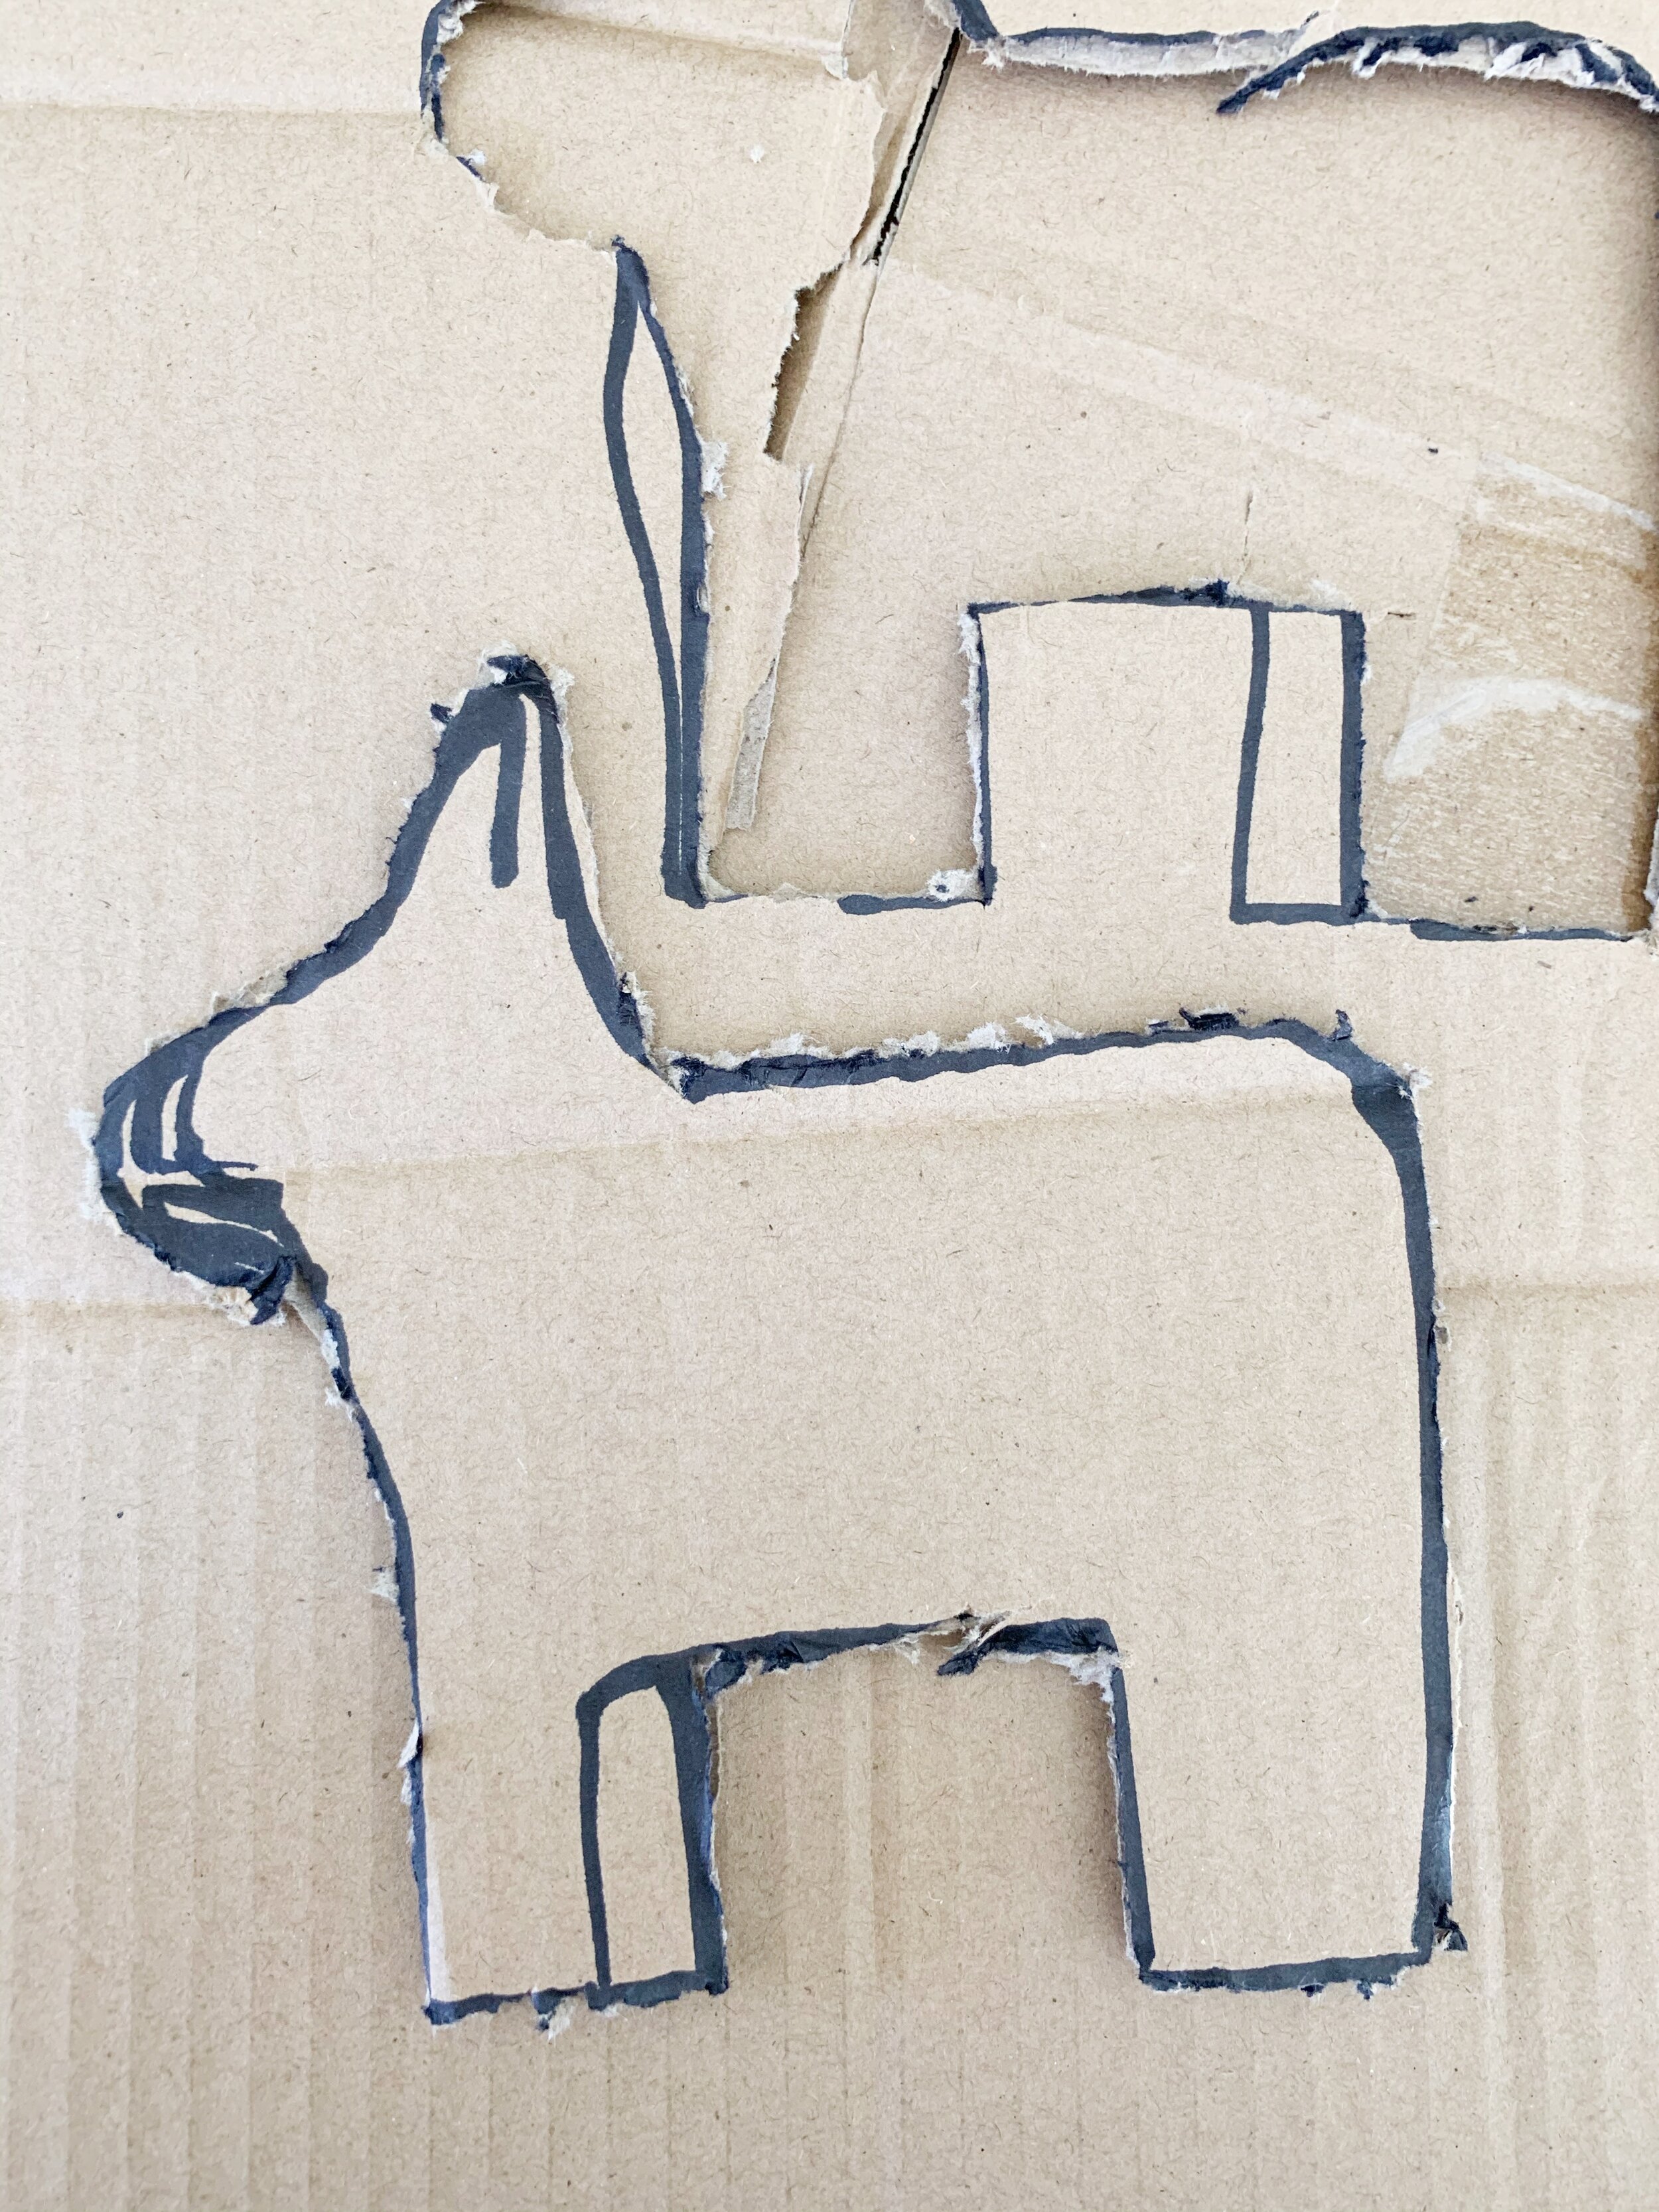
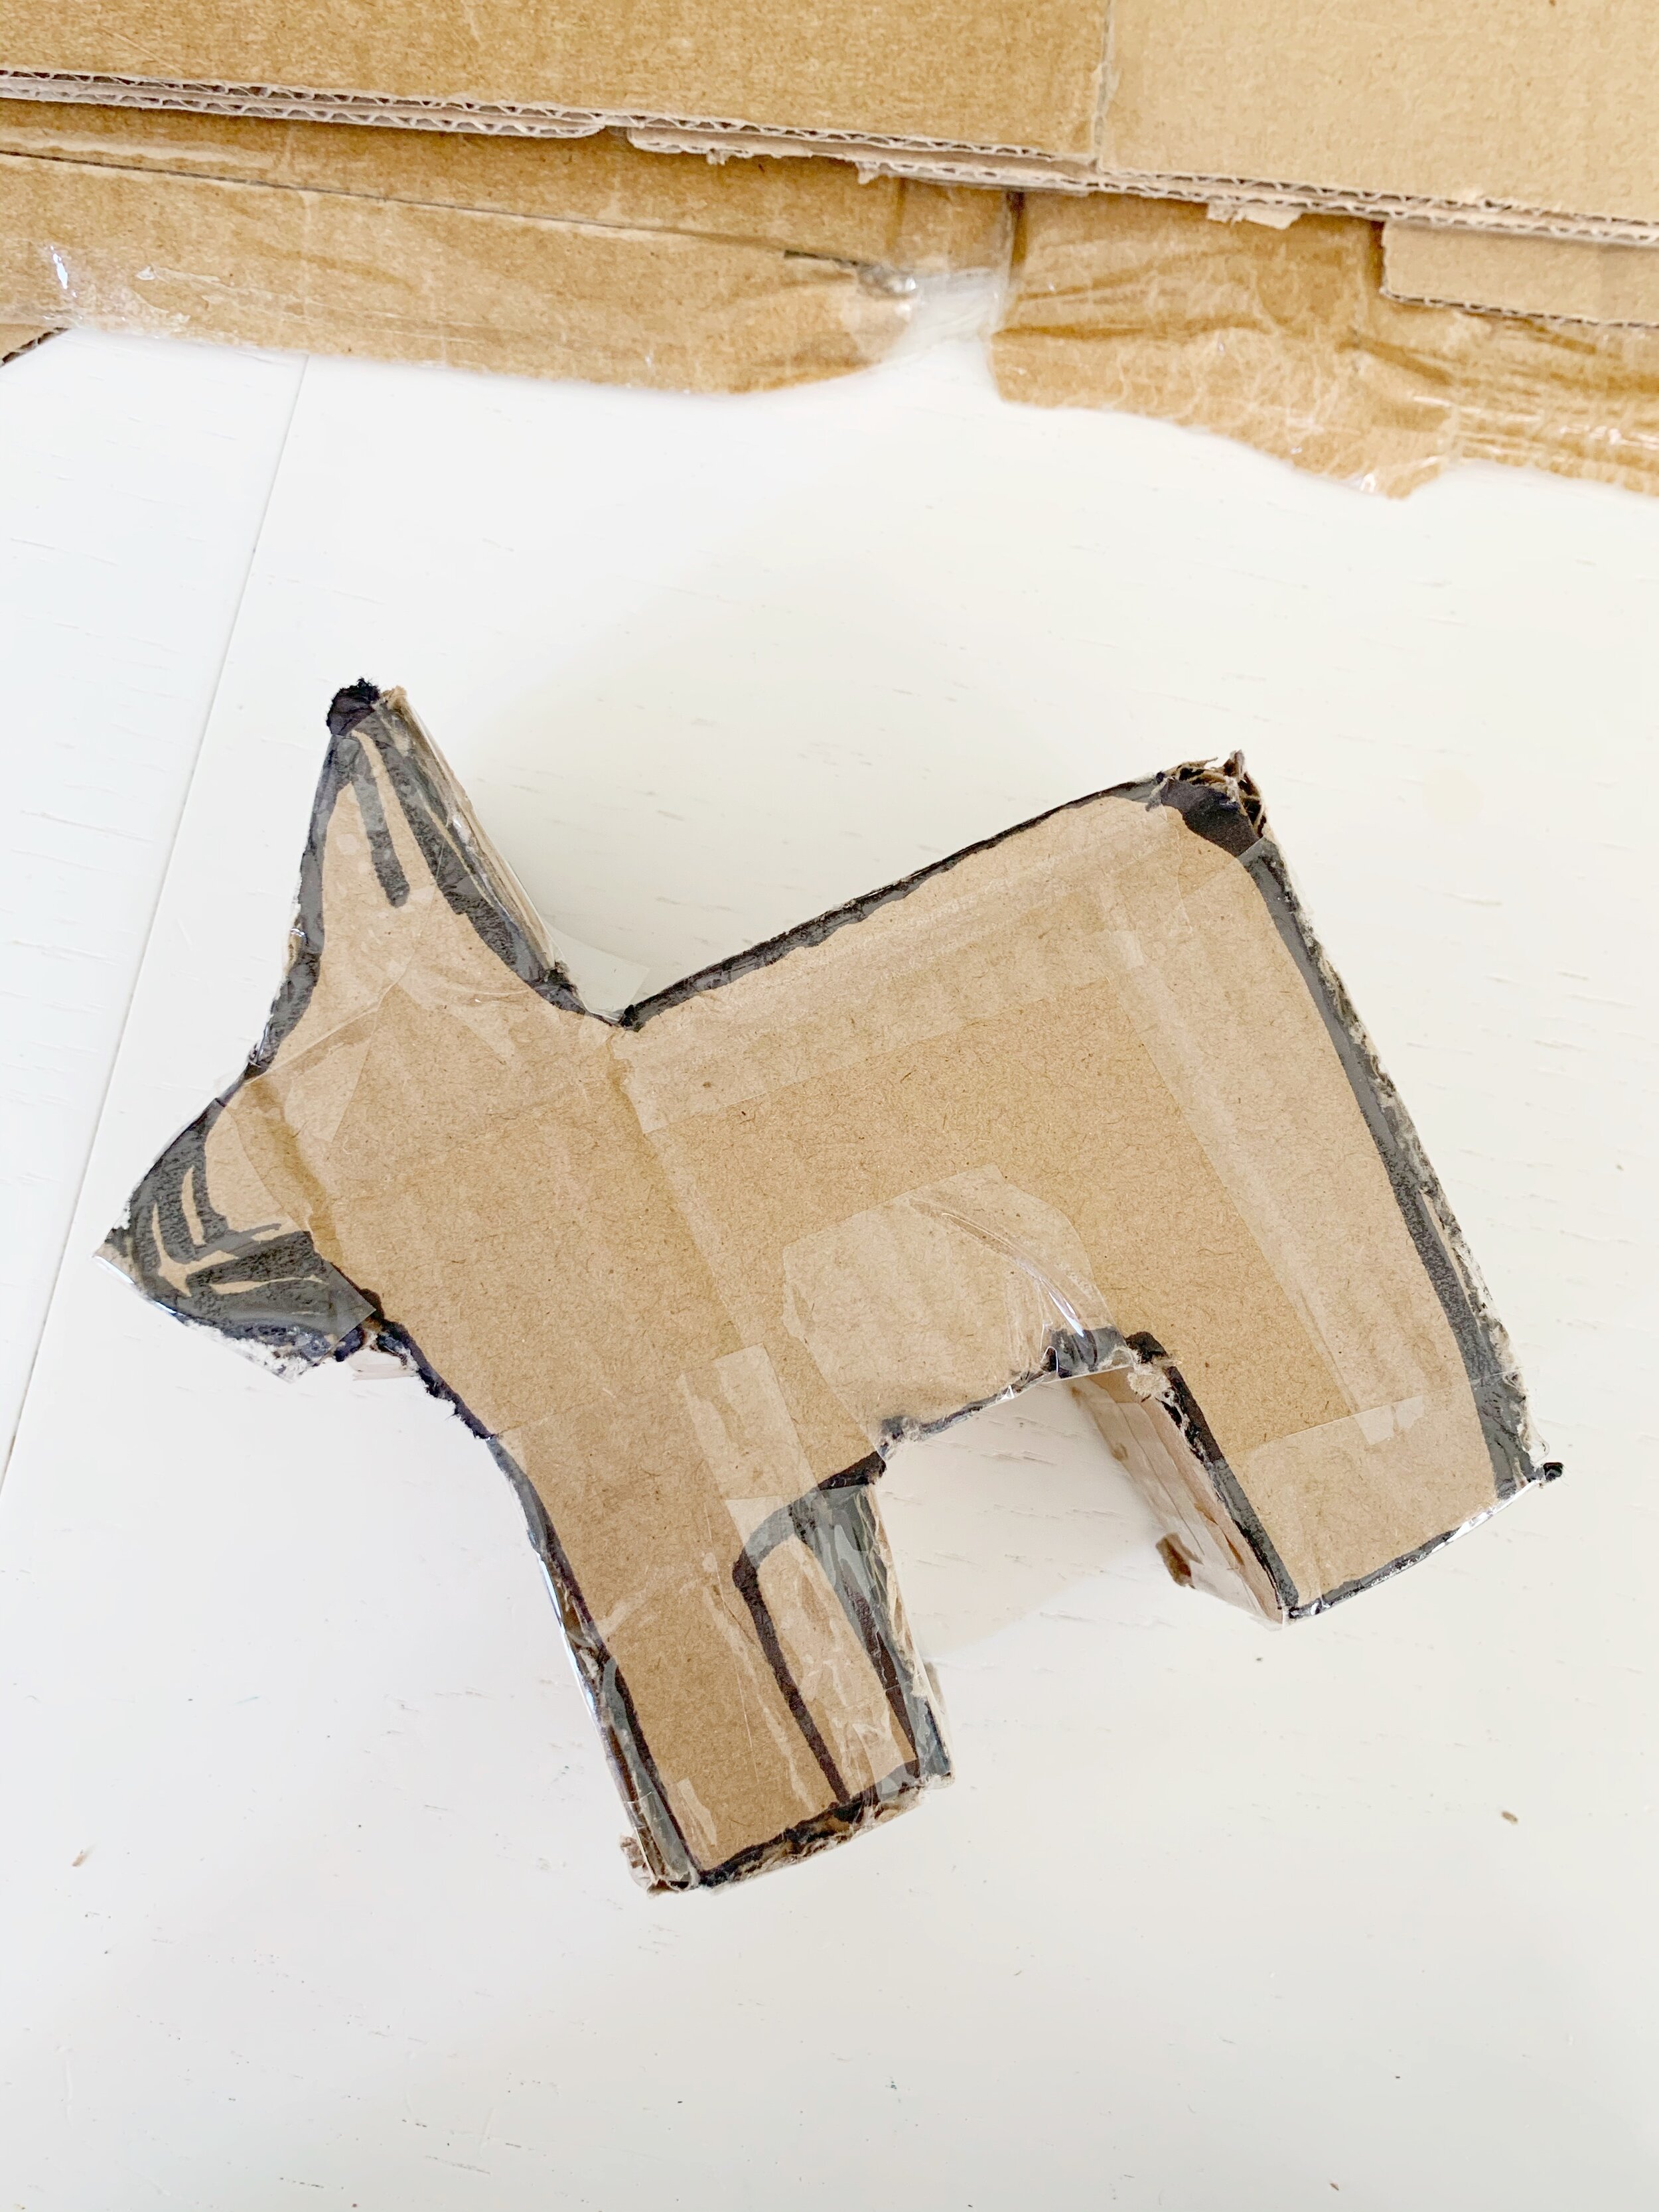
Step 1: Grab your cardboard and begin to trace your piñata shape. Don’t worry if you don’t get it perfect the first time … I didn’t! You’re creating an outline for the piñata that you’re going to cut out.

Step 2: Cut out your piñata shape using a box cutter, which I found easiest, or scissors. Then use that cut out to trace a second piñata side that you’ll cut out next.

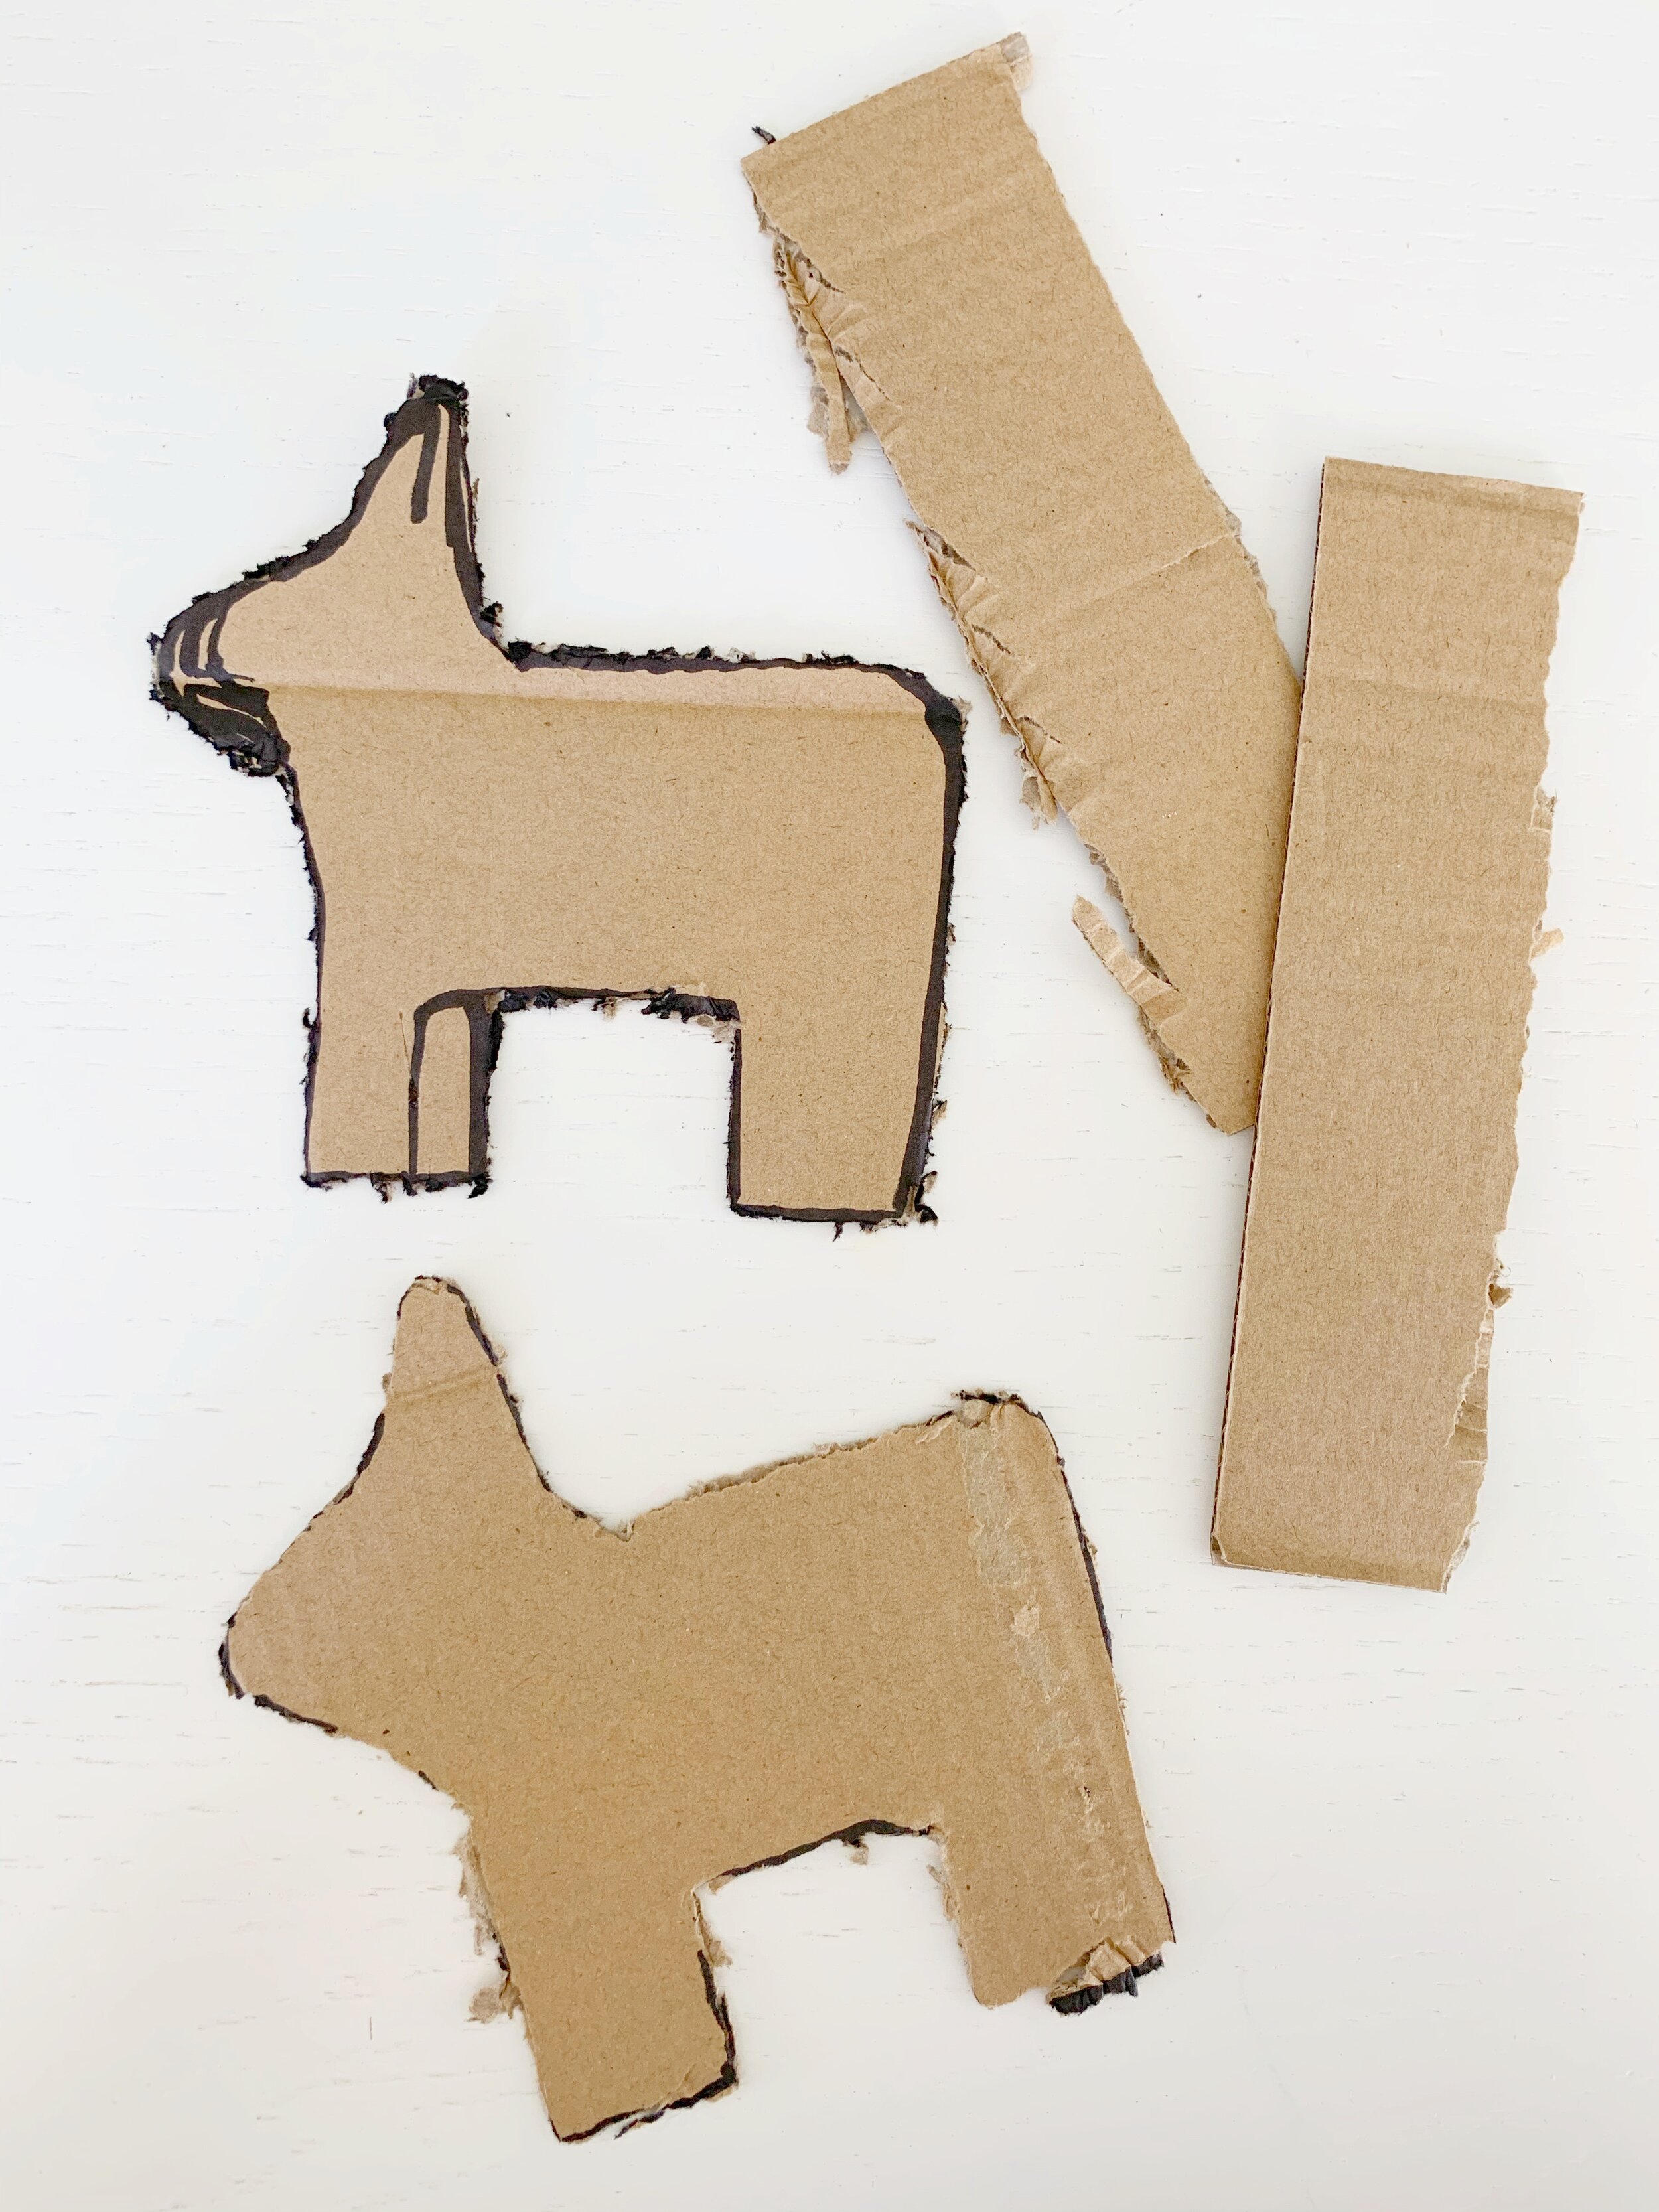
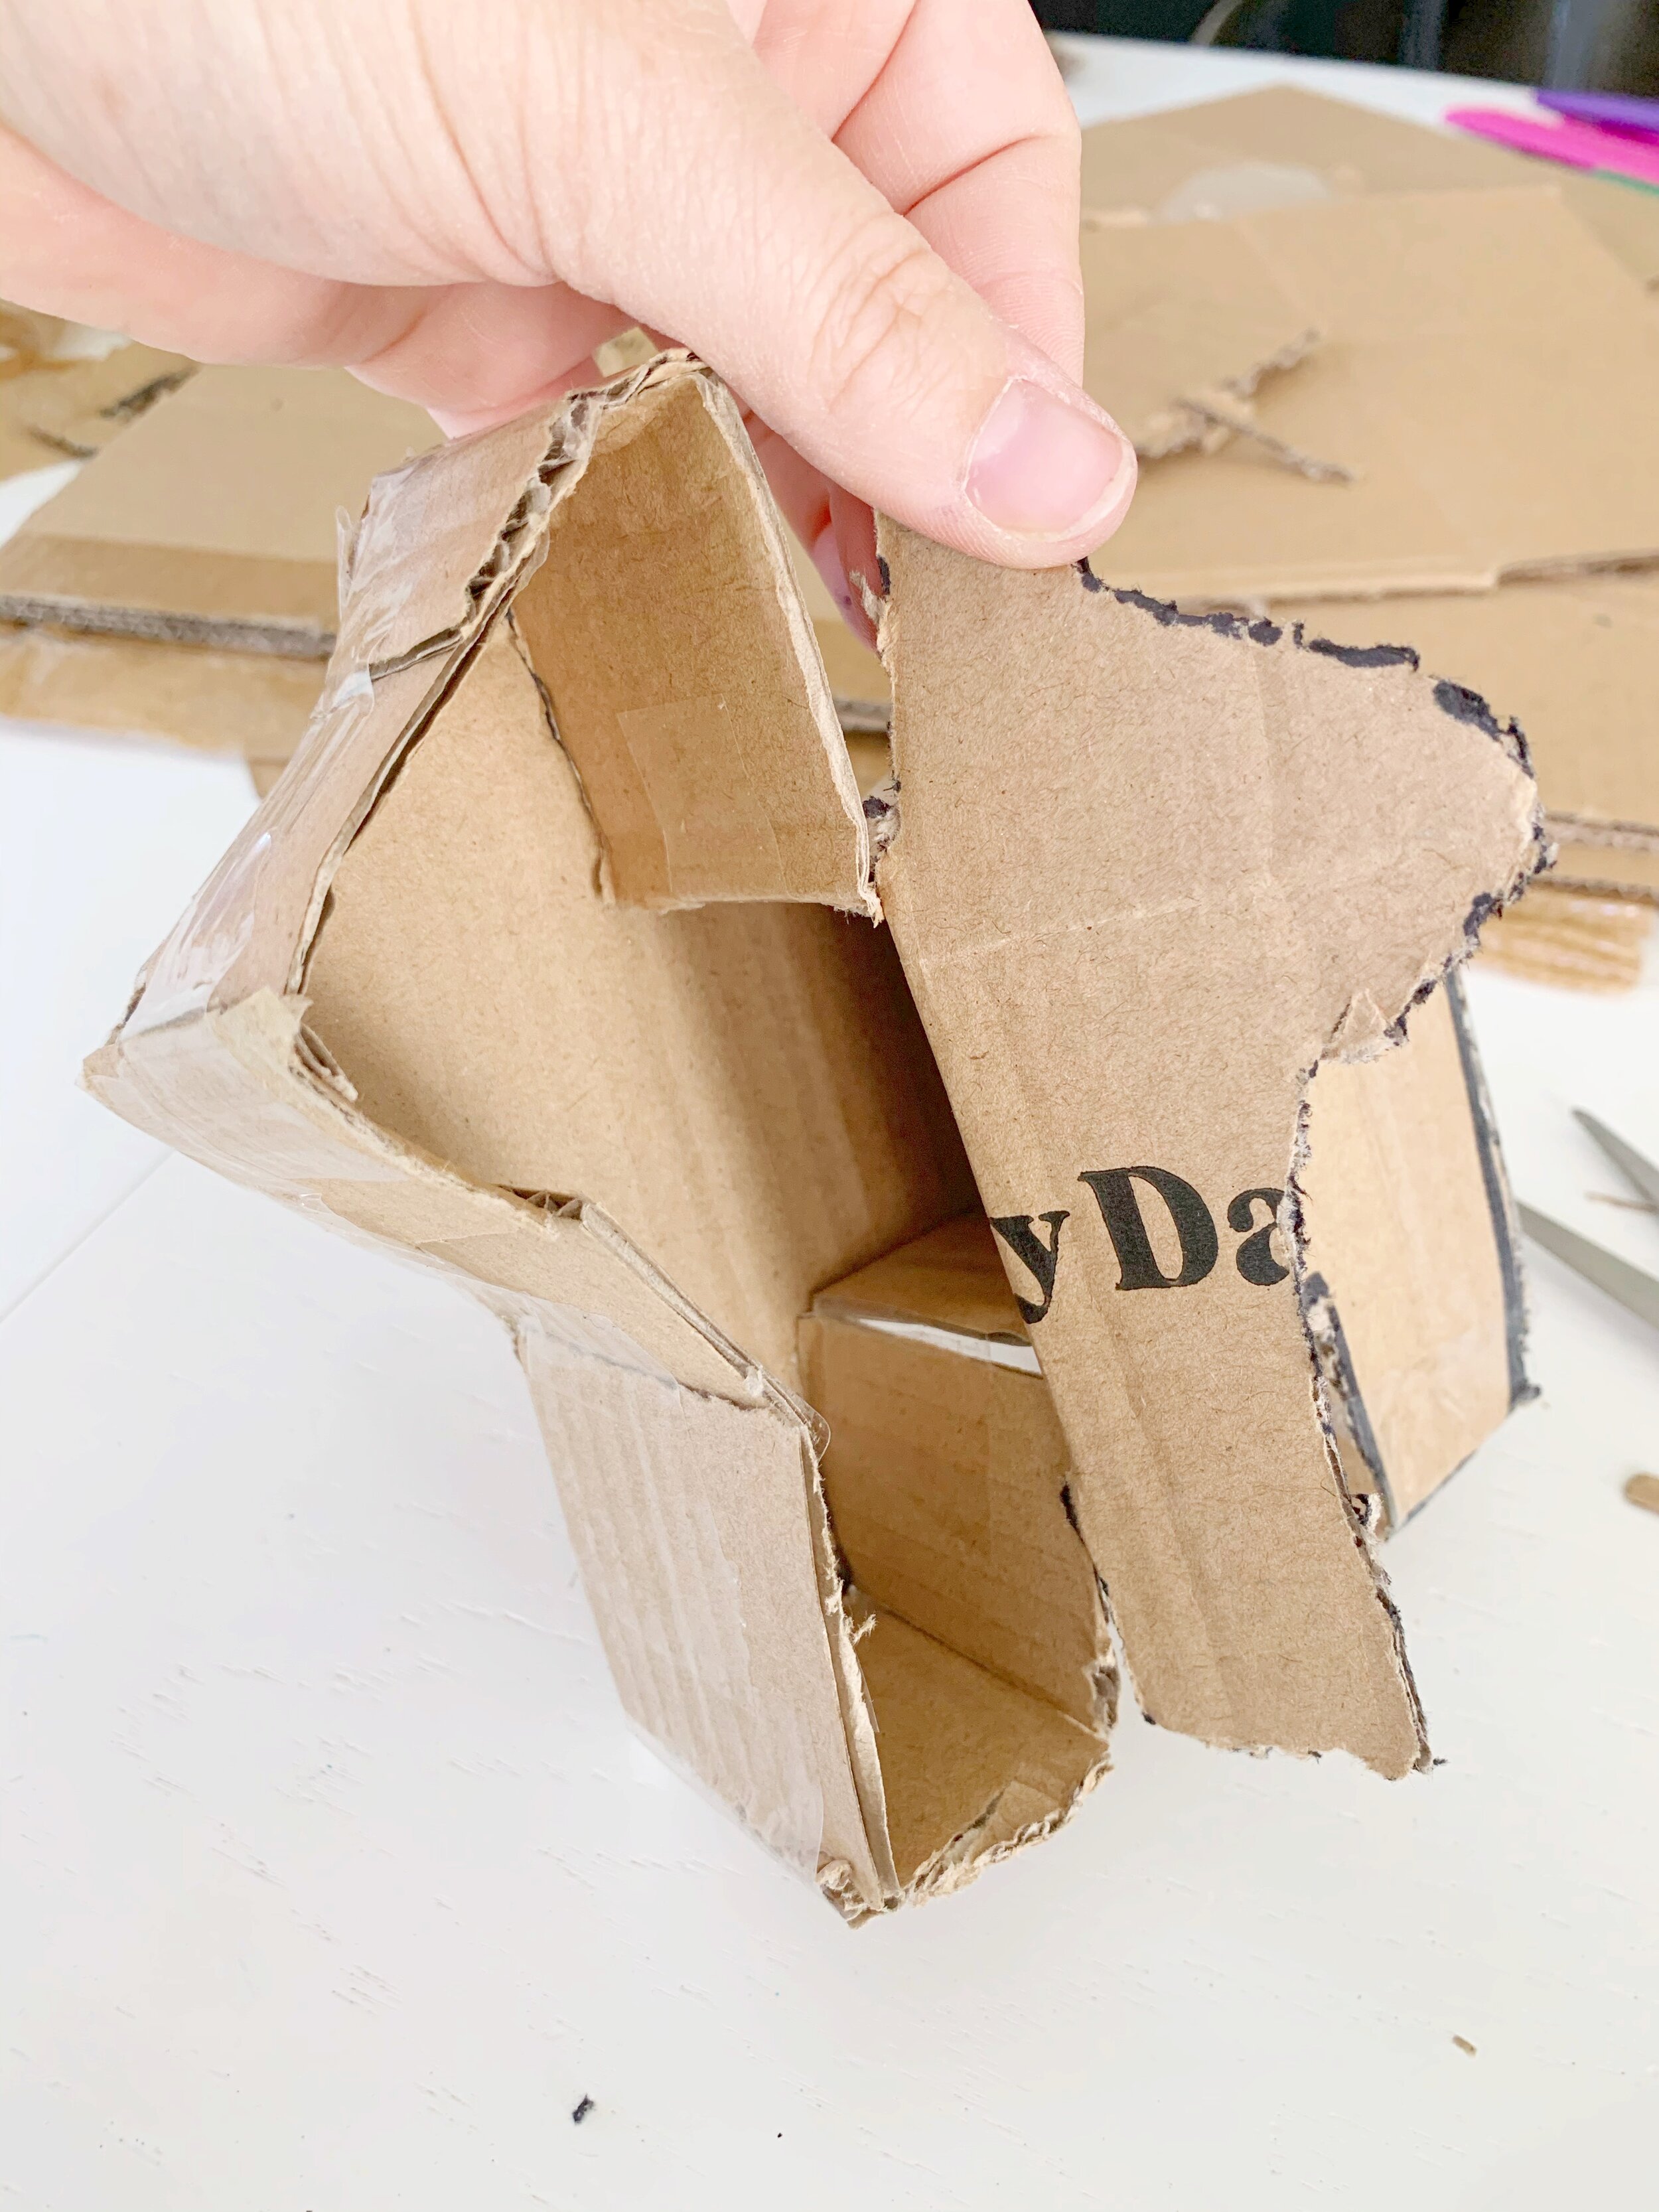
Step 3: Cut strips of cardboard. I cut up 4 strips. You’re then going to cut them in pieces as you use tape or a glue gun to secure them to one side of your piñata.

Step 4: Complete your piñata by adding the second side and secure using tape or a glue gun. Before you complete step 4, fill your piñata with candy or confetti or whatever goodies you have on hand. I did not fill my piñata today because I’m going to use it as a decor for our Cinco De Mayo celebration, and my son is going to want to play with it. But be sure to fill it now before adding the cardboard strips all the way around, if it’s your intention to break it open at some point.

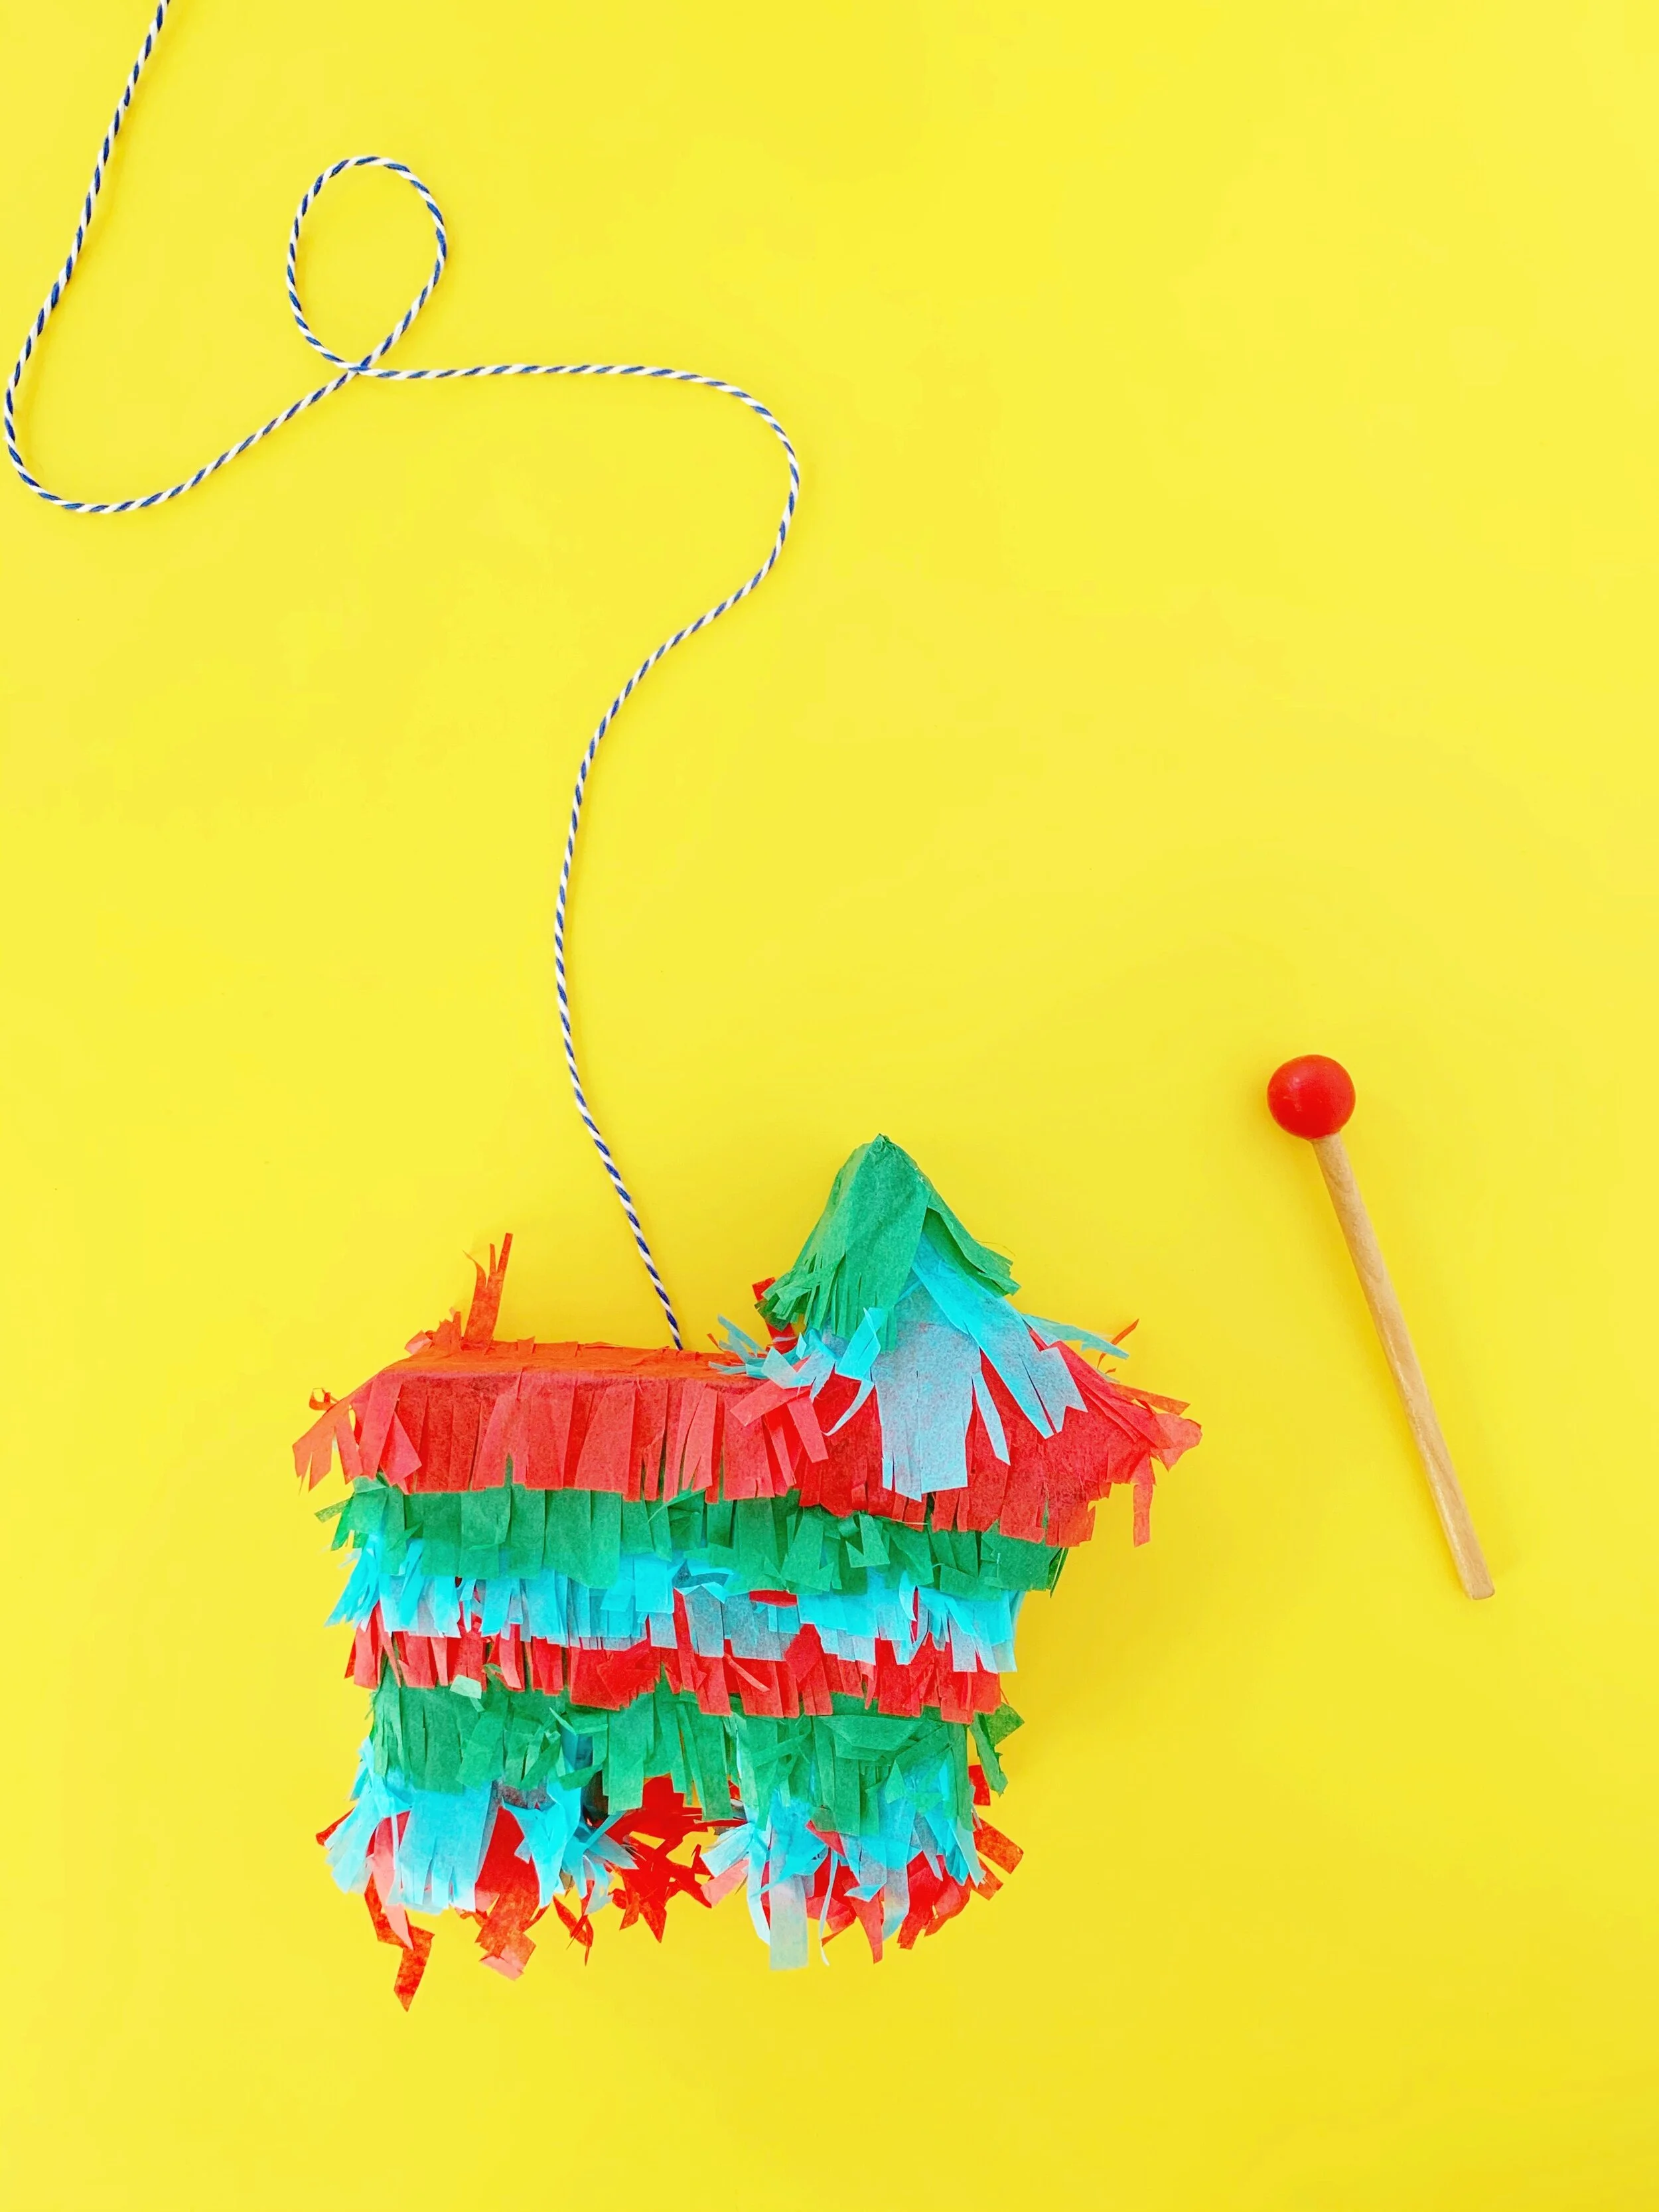
Step 5: Now that your piñata cardboard shape has been created, it’s time to add your tissue paper fringe! Cut your fringe to wrap around the piñata and secure using glue. I used a glue stick to attach the tissue paper fringe to the cardboard frame. It’s helpful to put down two layers of fringe in each strip to create more fullness. You will need to cut and paste to cover each inch of your cardboard piñata.

Step 6: Your piñata is complete! Hooray! Now if you’re using your piñata as table decor or as an accent piece, you don’t need to worry about adding a string to hang your piñata. If you wanted to use your piñata in the traditional way (i.e. hit it with a stick!), you would need to add the string to the top part of the piñata before you closed it up in step 4. If you decide to retroactively add a string to hang your piñata, no worries! Create a small hole with a tooth pick, then tie your string to the tooth pick and fish the tooth pick through the hole.

DIY Pinata For Cinco De Mayo

I hope you enjoy this craft as much as I enjoyed making it! Be sure to tag us on Instagram so that we can see how your piñata turned out!

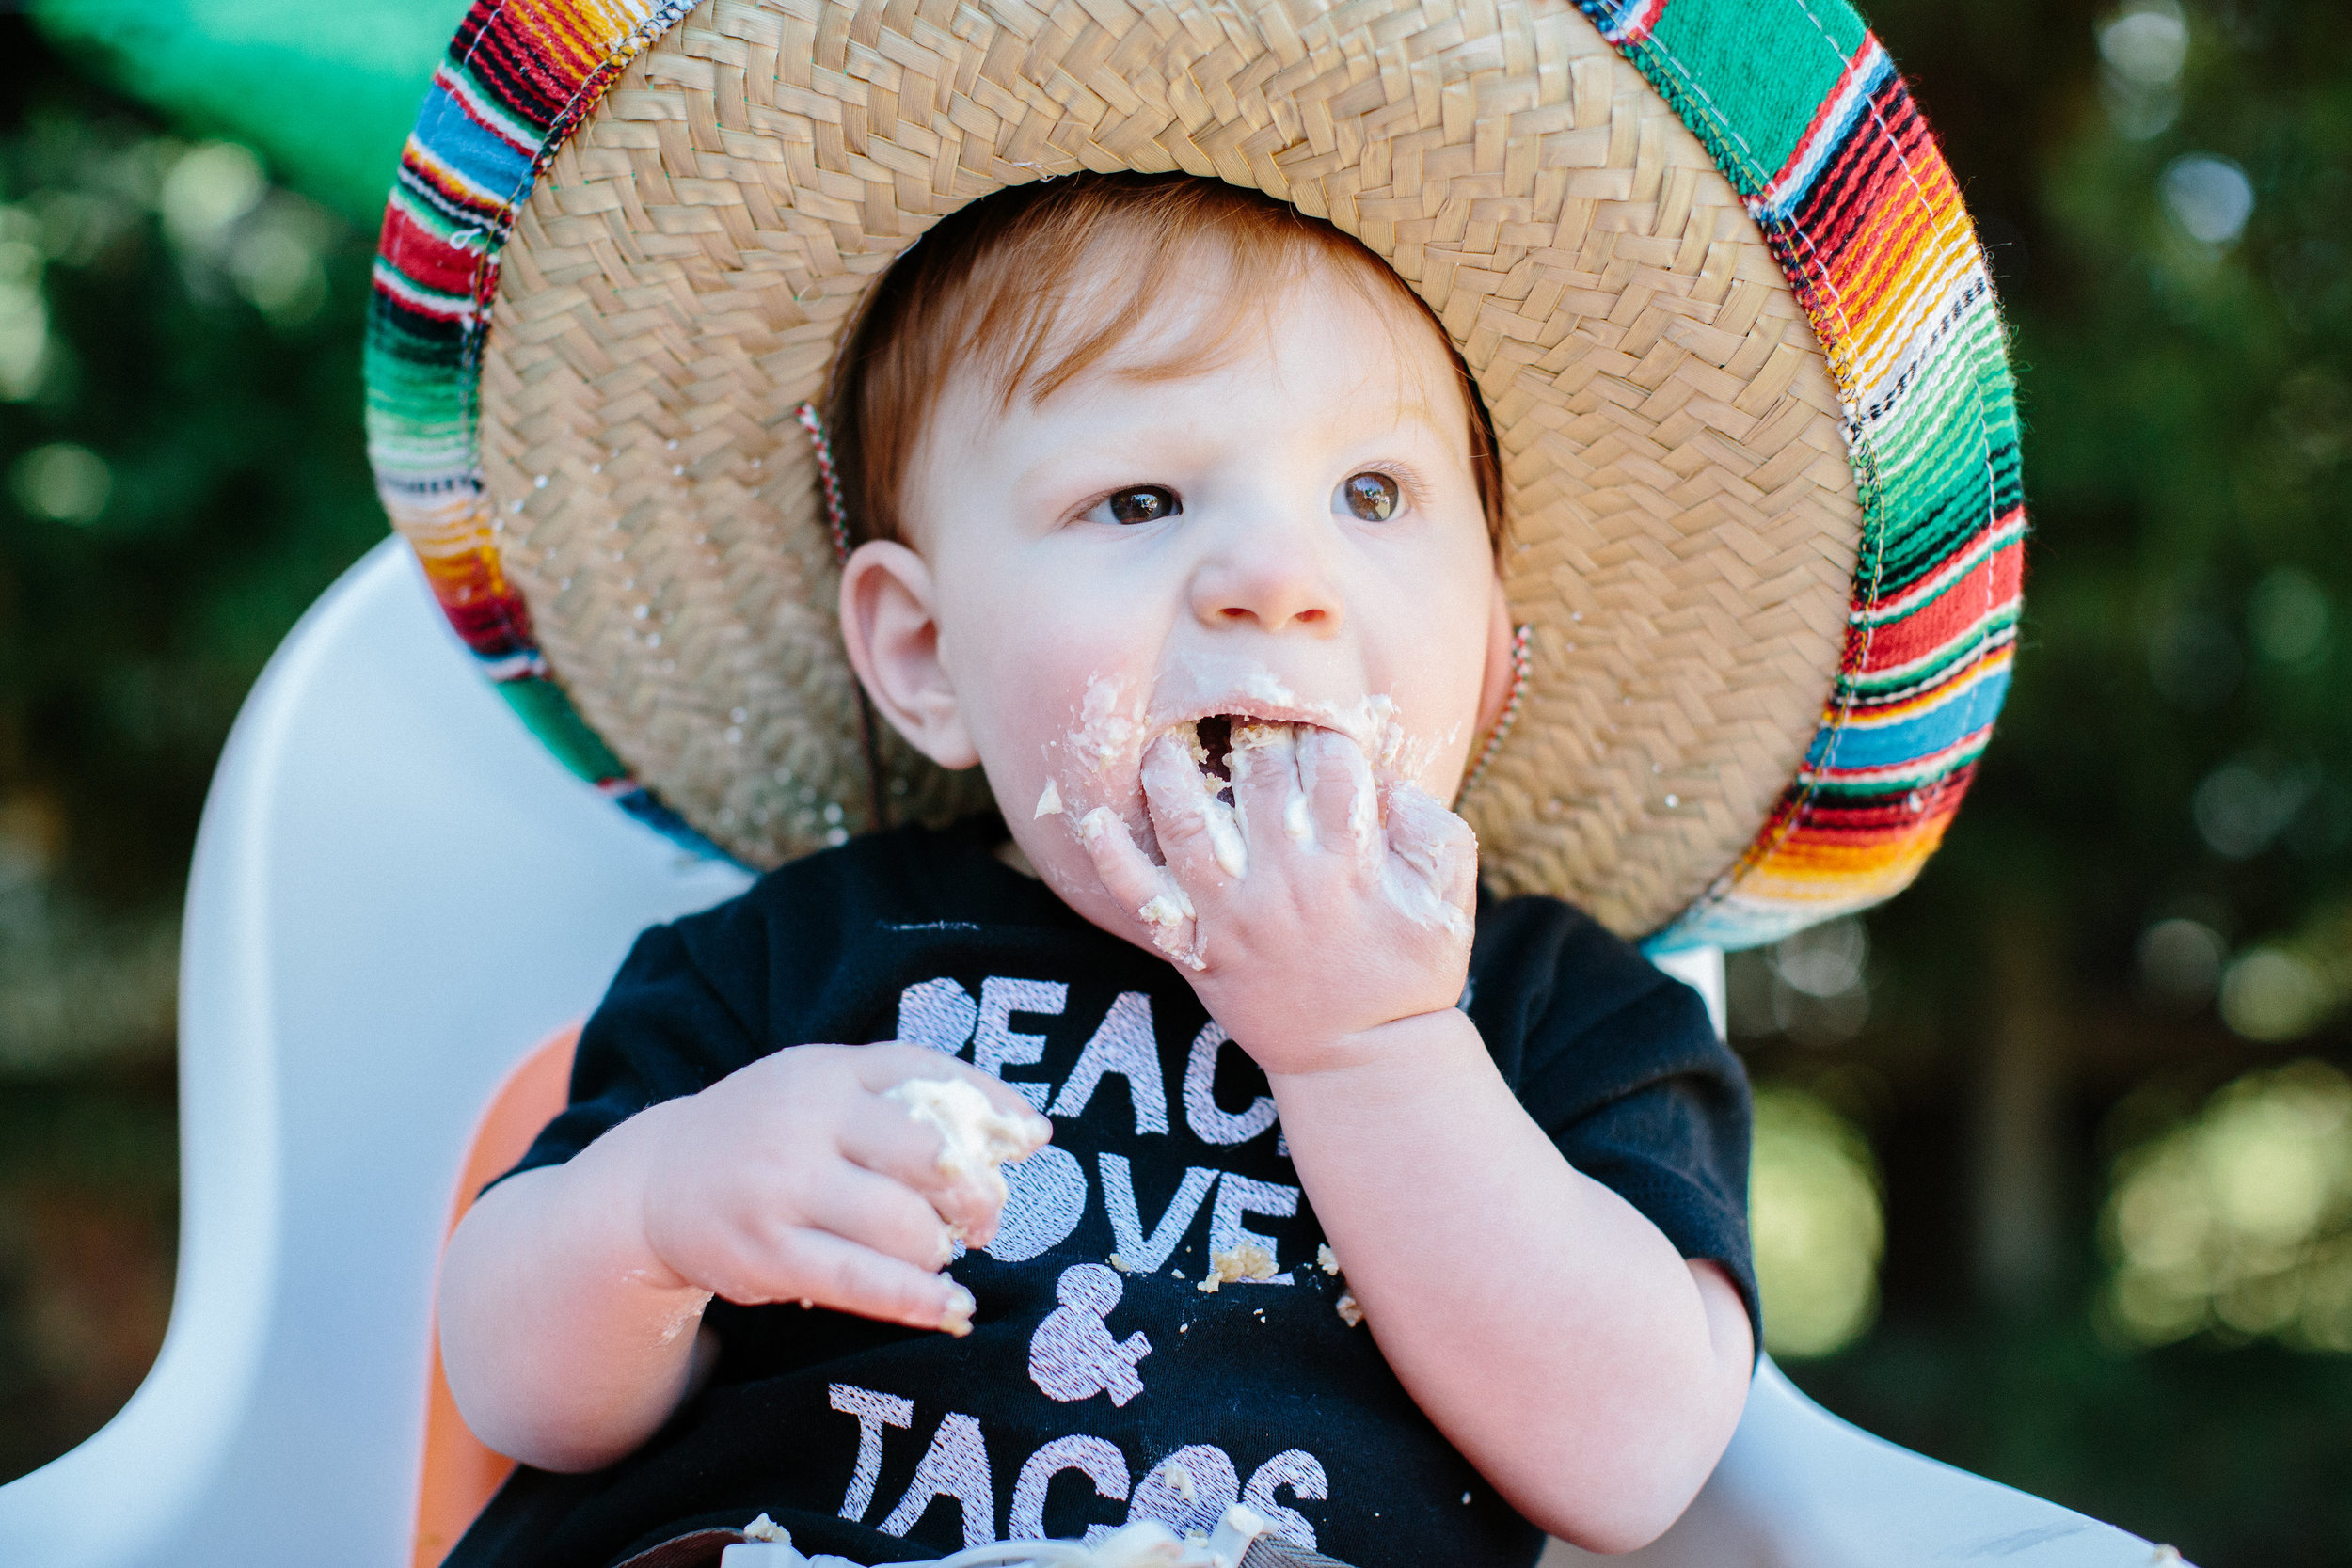
Happy Cinco De Mayo, friends!

XO,
A

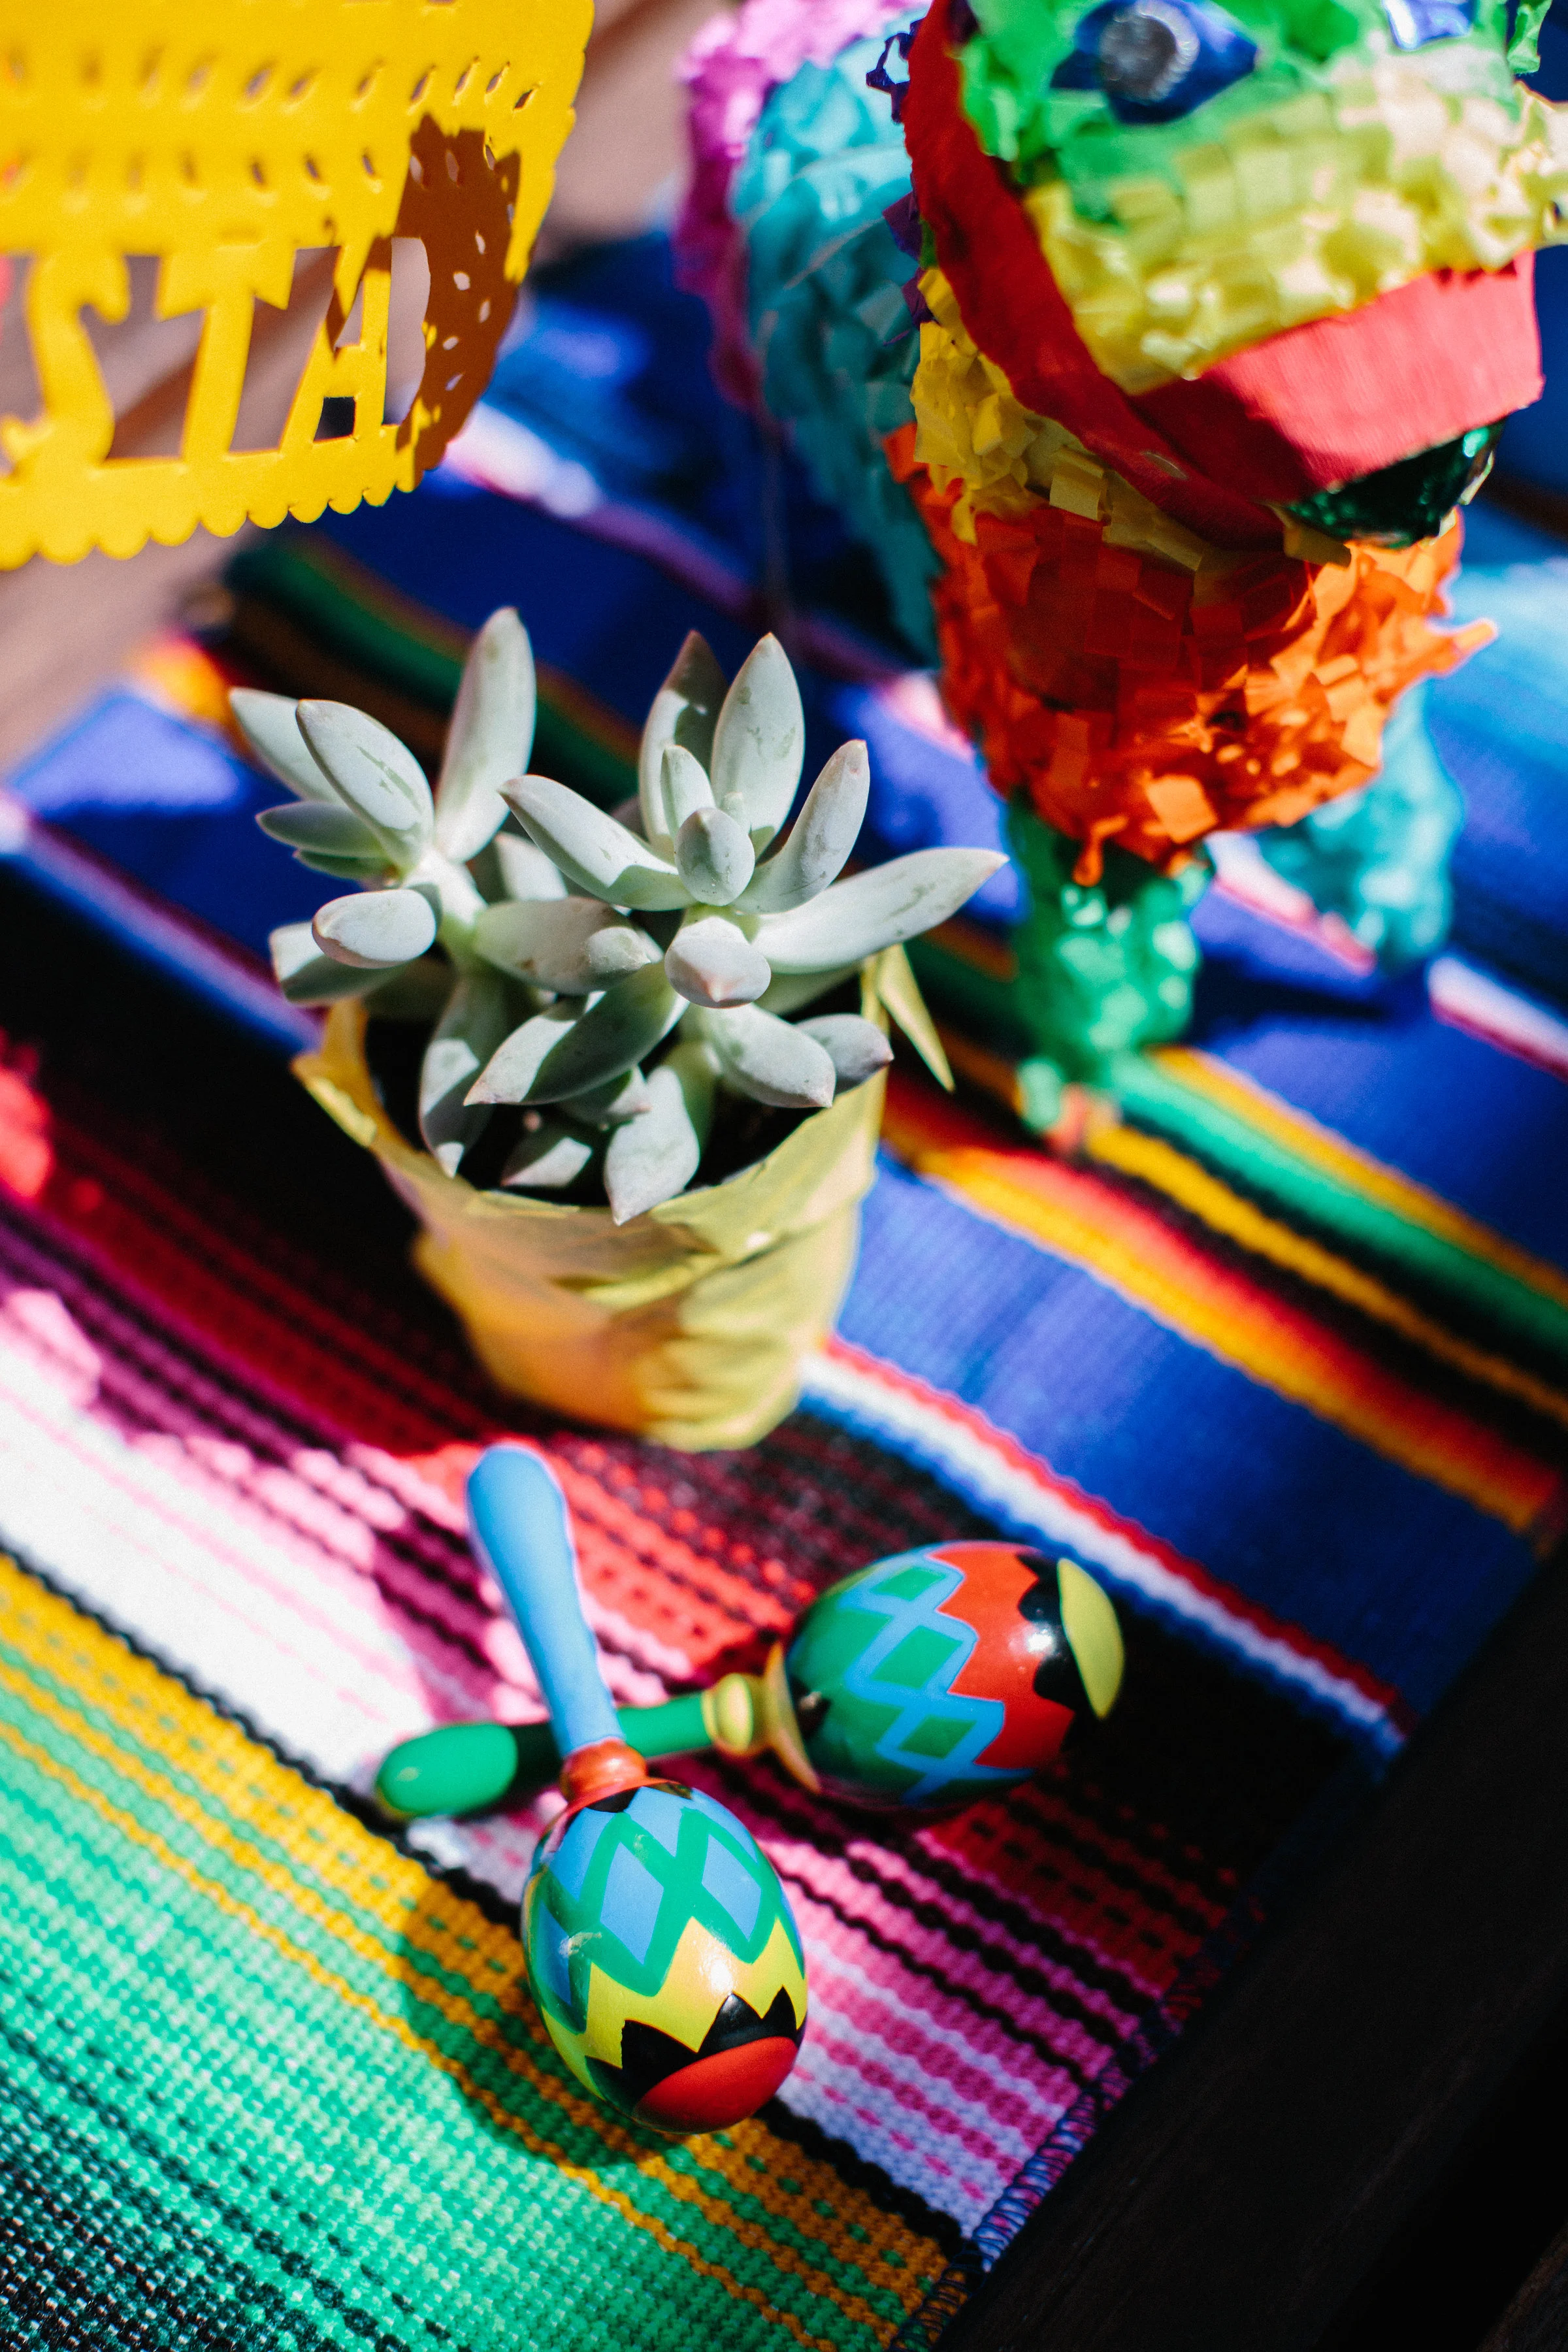
PS. If you’re hosting a fiesta, don’t forget to check out our Fiesta Party Kits and Party Sets!

Quarantine Activities: Fizzy Rainbow Science Experiment

I am all about trying to bring more fun into our home during this quarantine, and also sprinkle in some education. My toddler went crazy over this science experiment! Like most preschoolers, he just loves colors and rainbows - so this was right up his alley. My favorite part of this experiment was that the setup was very easy!

SUPPLIES NEEDED FOR YOUR EXPERIMENT

  • Cups. Any size will do, but the smaller your cup, the less of the other materials you’ll need and the more fizz spill. I preferred to use clear disposable cups that I had left over from a party.

  • Baking soda

  • Vinegar

  • Food coloring. Liquid is best. Avoid gel food colorings for this.

Step 1: Gather your materials

Before you officially begin, get all your materials out so you aren’t running back and forth to the kitchen. I recommend doing this experiment outside because it can get messy. If you’re doing this experiment inside, you might want to put your cups in a baking sheet and line it with parchment paper.

Fizzy Rainbow Science Experiment Materials

Step 2: Prepare your cups

Fill each cup with baking soda. Any amount will be good - but the more baking soda you add, the bigger the fizz! Don’t fill more than 3/4 of the way full because you'll want to have room for your vinegar.

Fizzy Rainbow Science Experiment

Step 3: Add your colors

Now it’s time to add a few drops of food coloring into each cup. One color per cup to create a rainbow effect. Once the color is added in, mix up your baking soda until the color is well distributed throughout. I used a long toothpick to stir. A straw would also work well.

Step 4: Add the vinegar

This is where the magic happens … this is the fun part!! You’re going to pour vinegar into each cup and watch the colors explode. Okay, not really explode … more like erupt! The baking soda reacts to the vinegar as the meet and create a fizzy rainbow eruption! The fizzy eruption doesn’t last that long, so move quickly. Add more baking soda and vinegar to get a second and third fizzy reaction.

The science behind it …

They react with each other because they exchange atoms. In this scenario, the baking soda actas as a base and takes a proton from vinegar, which is an acid. The reaction between the two materials releases gas because when the baking soda receives the proton, it transforms into water and carbon dioxide.

Fizzy Rainbow Science Experiment Quarantine Activity
Quarantine Activity With Kids Making a Fizzy Rainbow Science Experiment

My boys loved watching the colors come to life, and I hope your kids love it, too!

XO,
A.

Quarantine Activities: Free Coloring Pages For Kids

What better way to pass the time, and get those creative minds going, than with coloring! A perfect activity for a wide range of age groups, and it’s sure to keep little hands busy. I love getting my toddler involved with activities that spark creativity through self expression. Just like Billy Madison explained to Miss Lippy … he colored the duck blue because he’d never seen a blue duck! (Okay, that movie reference might be lost on some of y’all LOL)

But coloring is a perfect activity for:

- improving hand strength and pencil grip
- fine motor coordination
- helping to develop focus
- encouraging use of the imagination

So many artists and companies are releasing free coloring pages due to the Coronavirus Quarantine. I’m sharing a few with you, that I hope you and your littles will enjoy!

Daydream Society: Coloring pages inspired by their colorful party collections (many of which we carry in our shop … like these and these!)

Ashley Longshore Art: Inspirational women coloring pages

Lily Pulitzer: Coloring pages inspired by their famous prints

Crayola: Dozens and dozens of your favorite Disney characters ready to color

Brooklyn Berry Designs: Color and create your own space bookmark

Oh Yay Studio: Adorable doodle coloring pages

Canary Jane: A free nature scavenger hunt printable

Mighty And Kind Kids: A wonderful kids magazine for promoting kindness, offering a free bundle of resources for parents.

Love The Day: Lindi has opened her entire printable library, including these amazing coloring pages!

Courtney Khail: This talented watercolor artists has created a coloring page inspired by her floral work

Happy creating, friends!

XO,
A.

CREDITS
Links to the artists and companies websites listed above can be found here: Daydream Society | Ashley Longshore Art | Lily Pulitzer | Crayola | Brooklyn Berry Designs | Oh Yay Studio | Canary Jane | Mighty And Kind Kids | Love The Day | Courtney Khail


How To Host A Réveillon Dinner Party

Réveillon is a historic tradition in New Orleans, with ties to France. If you’re local to the area, you probably have heard of it, but you might not know it’s history.

The word réveillon derived from the French word meaning “awakening”. Réveillon started as a meal served after midnight mass on Christmas Eve. This tradition came to be when the city of New Orleans was almost entirely Catholic. Families would return home from midnight mass hungry, so they served a meal! These meals would be prepared in advance, waiting for families to return home from service. The menu is traditional made up of breakfast foods, such as egg dishes, pastries and breads, even puddings. But you could also find New Orleans staples like turtle soup, oysters, and grillades on the menu. The drink of choice was cordials, champagne, and wine. These dinners were an all-night affair and could last for many hours, even until dawn. But by the 1940s, Réveillon dinners could only be found in very traditional homes and was practically extinct due to the rise of other holiday traditions like, Christmas trees, purchasing gifts for children, and the craze of Christmas shopping.

Take a look at this video clip from my interview with Great Day Louisiana to learn more about Réveillon and see our table top inspiration that would be easy to recreate for your holiday celebrations!

IMG_7833.JPG

Party Animals Birthday Party

Why do kids have to keep growing up?! I feel like we were just celebrating our baby boy turning one, and now I blink and he's TWO! 

After Ryan's first birthday fiesta, I swore I'd take it easy on the next birthday party. But once I decided on the theme of "Party Animals", I just couldn't hold back - there were too many cute ideas floating around! Let's face it, there will eventually come a day when Ryan doesn't want a birthday party (cue tears!), or he'll want to do something less adorable than what I have in mind. So I'm making the most of it for now! Plus, the party planner in me just can't help it.

I went with "Party Animals" because Ryan really loves animals, especially cats ... or kitty kittys as he calls them. (I think it's the thrill of the chase that he's attracted to, really!) Once that theme clicked, the ideas started rolling in.  Tiny animals wearing party hats, a big colorful balloon garland, tails on chairs, a primary color palette, tambourine favors - the possibilities for decor were endless. A lot of love went into this party. The two major (and easy!) DIY projects were the tiny party hats for the mini animals and the colorful balloon garland decor. Tedious projects, but honestly they really only took a few hours each, and the end result was well worth it!

General party tips to parents: I'm a big believer in renting certain items to make life easier on the host(ess), like linens, tables and chairs. I personally don't want to have to invest in purchasing those things and then storing them. I also recommend outsourcing catering. It is 100% worth it! We went with BBQ, at my husbands request - and I love it because it was easy for guests to eat, crowd pleasing and it's filling. And yes, even a kids birthday party needs a signature drink! It's perfectly acceptable to serve alcohol at a kids birthday party. You want to cater to your guests - adult and children, alike! Our two signature drinks were Zoo Water (a non-alcoholic option) and Jungle Juice (an alcoholic option).

This was such a fun party to design, and I'm really excited to share it with you!

You can recreate this party, too, using the Party Animals party kit in the shop!

Sources:

The Perfect DIY Holiday-Inspired Cocktail

Who's ready for holiday parties?! You can't tell, but my hand is currently raised.

DIY Ornament Holiday Cocktail

It's no surprise, I'm sure, but I love parties. Like, you know how Buddy the Elf loves Christmas? Well, that's how I feel about parties! Since having Ryan (now a year and a half old ... holy moly, how did that happen?!), we don't get out much. Sad, but true ... #momlife. But it doesn't mean my love for parties has dimmed even slightly.

One night I was thinking of ways to fancy up my Friday couch session, and thought - hey, wouldn't a fun cocktail make this laid back night feel more exciting?? And that's how this Cran-Raspberry Vodka Fizz was born. I'm no mixologist, though. This is inspired by a drink created by One Sweet Mess, because I prefer vodka over gin.

You'll need:
yields 1 serving
1oz Vodka
1/2oz Cointreau or Triple Sec
2oz Cranberry Raspberry Spritzer (I found a great one at Trader Joes) OR you can use cranberry sprite
~1tbsp Orange juice (I squeezed 2 orange slices)
2 Rosemary springs
Cranberries for garnish
Cocktail shaker
Ice
Glass ornaments, large (I found these at my local Michaels)
Acrylic paint pen, oil-free (I used Sharpie brand to letter these)

DIY Holiday Ornament Cocktail

First up, time to do some faux calligraphy! Take your acrylic paint pen and write anything you'd like on the ornaments. I was going for a Holiday vibe, so I went with Holiday-ish stuff. But you can write your name on it, or your guests names, if you'd like to personalize them a bit more! The paint should be dry after about 3 to 5 minutes, so let it sit while you move on to step two. (Pro tip: if you mess up your lettering, use rubbing alcohol on a cotton ball to take off the paint and just start again.)

Now it's time to make the drinks! Take your shaker and add in the vodka, cointreau or triple sec, and rosemary sprig. Give the rosemary a little shake prior to adding it to the shaker to bruise it a bit, or you can muddle the sprig  just a little to release some fragrance. Add in some ice, the cran-raspberry spritzer, and a few squeezes of orange. Give it all a really good shake. Pour the contents of the shaker into the glass ornaments. Add in a fresh sprig of rosemary for garnish and a straw, so it's easy to drink. You can even pop in a few cranberries for extra garnish.

The tart of the cranberry mixed with the sweet of the orange makes this drink extra delightful, and really refreshing!

DIY Holiday Ornament Cocktail

Cheers, y'all! And happy shaking! 

XO,
A.

Photography credit: Paige Winn Photography


How To Throw A Fiesta Party


Who wants to throw a fiesta?! There is no better party theme - for gatherings both big and small - than a Cinco de Mayo theme. All the vibrant colors, the energy of the holiday, and of course, the food. Tacos, anyone? Oh, and margaritas! Enough said, am I right?!

My sweet little boy, Ryan, recently turned one. (I can't believe I typed that! We have a one year old - Ekk!) So to celebrate such a big milestone, I decided to go with a fiesta party for his birthday. Pulling all the details together was so much fun! I'm sharing some of our party details so that you can also throw a fabulous fiesta birthday party - or a "just because" fiesta for Cinco de Mayo on Friday!

Fiesta first birthday party
Fiesta first birthday party invitation minted

Loved our invitations from Minted.com! They were beyond perfect. Since all our family members live out of state (and not necessarily in driving range), I sent the invitations out 2 months in advance so that everyone both near and far would have time to mark their calendars and make arrangements, if they wanted to attend. I recommend sending invitations to your guests 6 to 8 weeks in advance for parties with primarily out of town guests, and 4 to 6 weeks for parties with guests mostly located in town. I'm a big fan of snail mail, so I went with a paper invitation. Minted is my favorite for purchasing invitations online. And you can always go the custom route and use a local stationer or Etsy shop vendor. But, evites are perfectly fine for party invitations, too! Some of my favorite places for electronic invitations are Minted, Paperless Post, eVite, and Punch Bowl.

Fiesta birthday party birthday cake and cupcakes
Fiesta birthday party cactus succulent cupcakes
Fiesta birthday party iced cookies
Fiesta birthday party
Fiesta birthday party birthday cake cinco de mayo party

I was completely obsessed with the cake and cupcakes Craft Cakes CLT created for the party! She executed my vision to the T! And bonus, y'all - they taste just as good as they look! Oh, and those cookies. Holy moly. Talk about delicious! Andrea with OneChic Cookie created these yummy and beautiful cookies. There were none left by the end of the party! The adorable cake topper is a banner from Etsy shop, Ay Mujer.

Fiesta first birthday party
Fiesta birthday party
Fiesta birthday party margarita bar drink display
Fiesta birthday party

I seriously love a good margarita. So, I had to make sure we had plenty of tasty marg's for our guests. I know it's a childs birthday party, but let's face it - how many friends does a one year old have?! These early birthday celebrations are more for the parents, so don't forget to include adult beverages in addition to child friendly options. Keep scrolling to the end of this post where I'm sharing my tried and true margarita recipe!

Fiesta birthday party
Fiesta first birthday party oversized gold balloons
Fiesta birthday party
Fiesta first birthday party centerpieces
Fiesta birthday party centerpieces for cinco de mayo party

When you're planning a party, think carefully about where you place food and drinks. Your guests will tend to gravitate towards the bar and the food. So for a casual party, like this, I decided to put chips and salsa on each table so that guests had something to munch on while sitting and chatting with each other. I didn't want everyone to feel like they had to stand and eat because tacos aren't exactly a one handed food. Don't feel like you need to keep the food located in one place - spread it out amongst the party area.

Fiesta first birthday party cocktail napkins cinco de mayo
Fiesta first birthday party centerpieces cinco de mayo party
Fiesta first birthday party mini maracas
Fiesta birthday party centerpieces serape runner tablescape

It's no lie that I'm a all about the details! So when planning for this party, there was no way that I would cut corners when it came to the details. Believe it or not, this was very easy to pull together thanks to a fiesta Party Kit. Serapes, pinatas, paper banners, colorful plates and napkins - everything you need to throw a fabulous fiesta is included in this Party Kit! By the way, aren't these mini pinata's a trip? I'm obsessed! I went to good ol' Home Depot for the cactus' and succulents, and wrapped them in tissue paper. It was an easy and inexpensive way to add color to the table and stick with my fiesta theme. We gave the succulents and cactus' away to our family and friends as parting gifts, if they wanted to take them. But we did keep one cactus for ourselves as a little memory of Ryan's first birthday party, and hope to incorporate it to our garden one day so that we can tend to it together once he's older! I sprayed cans gold to hold the "viva fiesta" paper flags. Cocktail napkins are always an easy detail that gets a lot of attention. These hilarious napkins can be found in my Etsy shop.

Fiesta birthday party decor cinco de mayo inspiration
Fiesta first birthday party centerpieces
Fiesta first birthday party centerpieces cinco de mayo mini maracas

I had way too much fun planning the details of this party - can you tell?! So grateful to Paige Winn Photography for capturing all the details for me so that I didn't have to have my phone on me at all during the party!

I decided to make his smash cake myself, and it's one of my favorite recipes! Especially if you aren’t quite ready to give your kid all the processed sugar at age 1 - it’s gluten free, grain free and paleo friendly. And if there is any doubt as to whether or not Ryan loved his first taste of cake, just keep scrolling down! (Spoiler: He demolished it! And it was the greatest thing I've ever witnessed!)

Fiesta first birthday party smash cake
Fiesta first birthday party
Fiesta first birthday party smash cake


Okay, so now for the good stuff - the margaritas! This is the recipe I used for the party, and it's my overall go to for a refreshing cocktail that is easy to make.

The Perfect Margarita
- 2 oz Silver Tequila (whatever brand! I prefer silver over gold)
- 1 oz Triple Sec/Cointreau
- 1-2 oz Lime Juice (basically, 1 medium lime)
- Garnish with sliced jalapeño peppers and/or cilantro for extra flavor

IMG_2132.JPG

Happy Cinco de Mayo, y'all!

XO,
A.

For more information about the Party Kits, visit this page


How To Create A Centerpiece Using Grocery Store Flowers

 
how to create a centerpiece using grocery store flowers from trader joe's

Everyone has asked themselves the question: "What would I do if I had endless amounts of money??" You probably thought about little luxuries to splurge on like a personal chef to cook all your meals, or a housekeeper that cleans every day. While I wouldn't say no to either of those things, I love the idea of having fresh flowers in my house all the time. It just makes a home feel like a home - and a bit fancy! But, we don't need to wait to win the lottery in order to have beautiful flower arrangements in our home on a regular basis. Anyone can create a flower arrangement for under $30 - even with grocery store flowers from Trader Joe's! I'll show you how.

Trader Joe's always has the best flowers, so it's my go-to for fresh blooms. But the farmer's market is also an amazing place to find gorgeous flower from local growers. So, hunt for the best place in town. Know what vase you're planning to use before you purchase flowers. That way you know you will have enough to work with - or on the flip side, not have a whole bunch of left overs. My floral style tends to be more organic and textured. I was looking for flowers with natural lines, and tulips are perfect for that! Hyacinth was my go to for a little color contrast and texture.

flower arrangement using grocery store flowers from Trader Joe's
creating flower arrangements using grocery store flowers from Trader Joe's

Once you purchase your flowers, you'll need to process them them. This basically means that you will want to prep the flowers for being arranged. Be sure to stick the flowers in water after you get home - especially if you don't plan on arranging them right away. You'll want to cut each stem on an angle. This helps the extend the life of the flower because it can drink water better. You'll also want to remove any leaves and stems that might go into the water. Not only will this also help extend the life of your arrangement, but it'll create more space in the vase for your stems - which you will need! Put some water in the vase before you begin, and don't forget the flower food. I like to start with some greenery and the larger blooms first, adding in just a few pieces at a time to create a base.

Next, you will layer in the other blooms and start to create your shape. You can take stems out after you put them in! This is your arrangement, so edit as you go until you're happy with the look.

Depending on where you plan to display your masterpiece, you can either make a one-sided bouquet or one that can be viewed from all sides. Mine is going on my kitchen table, so I made an arrangement that can be viewed from any angle. And as you can see I did this on my kitchen counter, so you don't need a fancy work space or tools. Just a good pair of scissors! All in all this arrangement took me roughly 30 to 40 minutes to create, from the start of processing the flowers to filling up the vase with water after my last edit. It was the perfect creative project to do during naptime! 

And here is my final arrangement!

how to create a centerpiece using grocery store flowers from trader joe's

Oh, and in case you were wondering, this floral arrangement is cat approved!


XO,
A.


It's All in the Little Details

I'll admit that I have a special appreciation and love of the little details.  After all, it's the little details that make life special, and the special moments in life personal.  With each new wedding design, my goal (always) is to make those little details, that are so important to brides and grooms, come to life! I've had the opportunity to create a lot of things over the years for brides and grooms. And, after finishing some watercolor creations for a wedding at Daniel Stowe, a Chuppah for two spring weddings, and lots and lots of escort cards, programs, and favor tags, I thought "I really need to gather up all these little projects and share them!" So, without further adieu - here are some of the things I've created for weddings so far in 2014 that I wanted to share! A few have been complete surprises, and revealing those surprises to my sweet clients brings me so much joy!  Just a warning: the photo quality is not that great - actually it's down right awful! - and is courtesy of my trusty iPhone. (Thank God for real photographers!) So, please excuse my photos... I'll just stick with wedding planning and leave the photography to the pro's! 

Custom table runners for Katie & Eric's Mint Museum Uptown wedding

IMG_3733_20140405_181018-e1400634848673.jpg
IMG_3642_20140405_173823-e1400634904406.jpg
IMG_3709_20140405_175919.jpg

Prop pillows and ring bearer pillows for Katie & Eric's Mint Museum Uptown wedding

IMG_3438_20140403_092411.jpg
Katie-Eric-Ceremony-22.jpg

Sashes for the draping to match the runners and pillows for Katie & Eric's Mint Museum Uptown wedding

IMG_3711_20140405_180710.jpg

Floating frame display for Katie & Eric's Mint Museum Uptown wedding

IMG_3701_20140405_175628.jpg
IMG_3657_20140405_174145-e1400634877604.jpg

Watercolor table numbers for Mia & Alex's Daniel Stowe Botanical Garden wedding

IMG_3922_20140416_104154.jpg
IMG_4107_20140419_191051-e1400634811509.jpg

Watercolor seating chart for Mia & Alex's Daniel Stowe Botanical Garden wedding

IMG_4114_20140419_191349.jpg

Chuppah and organza draping for Mindy & Brett's Biltmore wedding (Okay, confession: I can't take all the credit for this one. My amazing husband actually built this chuppah for two weddings this year, and has come to both weddings to help me assemble it on-site. So grateful to have such a supportive and super crafty husband!!) 

IMG_5666_20140503_175459.jpg

Ceremony programs for Mindy & Brett's Biltmore wedding

IMG_5663_20140503_173438.jpg

Calligraphy favor tags for Mindy & Brett's Biltmore wedding

IMG_5966_20140503_221003.jpg

Acrylic table numbers for Whitley & Darian's Brakefield at Riverwalk wedding

IMG_3113_20140322_181059.jpg

"Here Comes The Bride" sign for Veronica & Chip's Mint Museum Uptown wedding

IMG_4567_20140426_164007-e1400634778853.jpg

Travel-themed escort card display for Veronica & Chip's Mint Museum Uptown wedding

IMG_5017_20140426_210838.jpg
IMG_5014_20140426_205933.jpg
IMG_5015_20140426_210533.jpg

Travel-themed table numbers for Veronica & Chip's Mint Museum Uptown wedding

IMG_5012_20140426_204930.jpg

Citrus-themed escort cards for Taylor & Kyle's Byron's South End wedding

IMG_6787_20140517_181224-e1400634746550.jpg

I hate to even share all of these terrible iPhone quality photos, but I'm really proud of the little details that leave my office each weekend to make their way to the amazing brides and grooms wedding days. I'm honored to have the opportunity to be creative and give priority to the special touches of a wedding day!  And believe me when I say that each has been an absolute labor of love.  But it makes me so happy to see my brides and grooms smile with excitement over these details they never expected!

XO,
A.