An Easy DIY Piñata for Cinco De Mayo

I love a good DIY! And I love a good craft for a theme party! So, with Cinco De Mayo less than a week away, I thought I’d share this super easy DIY piñata craft!

DIY Pinata Craft for Cinco De Mayo

Supplies:
- Cardboard box. Use your left over Amazon boxes, cereal boxes … any sort of cardboard box
- Scissors and a box cutter, for cutting and trimming the cardboard boxes
- Marker or pen
- Glue stick
- Tape or glue gun
- Tissue Paper
- Scissors or Fringe scissors for creating the fringe out of tissue paper

IMG_4533.JPG

Step 1: Grab your cardboard and begin to trace your piñata shape. Don’t worry if you don’t get it perfect the first time … I didn’t! You’re creating an outline for the piñata that you’re going to cut out.

Step 2: Cut out your piñata shape using a box cutter, which I found easiest, or scissors. Then use that cut out to trace a second piñata side that you’ll cut out next.

Step 3: Cut strips of cardboard. I cut up 4 strips. You’re then going to cut them in pieces as you use tape or a glue gun to secure them to one side of your piñata.

Step 4: Complete your piñata by adding the second side and secure using tape or a glue gun. Before you complete step 4, fill your piñata with candy or confetti or whatever goodies you have on hand. I did not fill my piñata today because I’m going to use it as a decor for our Cinco De Mayo celebration, and my son is going to want to play with it. But be sure to fill it now before adding the cardboard strips all the way around, if it’s your intention to break it open at some point.

Step 5: Now that your piñata cardboard shape has been created, it’s time to add your tissue paper fringe! Cut your fringe to wrap around the piñata and secure using glue. I used a glue stick to attach the tissue paper fringe to the cardboard frame. It’s helpful to put down two layers of fringe in each strip to create more fullness. You will need to cut and paste to cover each inch of your cardboard piñata.

Step 6: Your piñata is complete! Hooray! Now if you’re using your piñata as table decor or as an accent piece, you don’t need to worry about adding a string to hang your piñata. If you wanted to use your piñata in the traditional way (i.e. hit it with a stick!), you would need to add the string to the top part of the piñata before you closed it up in step 4. If you decide to retroactively add a string to hang your piñata, no worries! Create a small hole with a tooth pick, then tie your string to the tooth pick and fish the tooth pick through the hole.

DIY Pinata For Cinco De Mayo

I hope you enjoy this craft as much as I enjoyed making it! Be sure to tag us on Instagram so that we can see how your piñata turned out!

Happy Cinco De Mayo, friends!

XO,
A

PS. If you’re hosting a fiesta, don’t forget to check out our Fiesta Party Kits and Party Sets!

Quarantine Activities: Fizzy Rainbow Science Experiment

I am all about trying to bring more fun into our home during this quarantine, and also sprinkle in some education. My toddler went crazy over this science experiment! Like most preschoolers, he just loves colors and rainbows - so this was right up his alley. My favorite part of this experiment was that the setup was very easy!

SUPPLIES NEEDED FOR YOUR EXPERIMENT

  • Cups. Any size will do, but the smaller your cup, the less of the other materials you’ll need and the more fizz spill. I preferred to use clear disposable cups that I had left over from a party.

  • Baking soda

  • Vinegar

  • Food coloring. Liquid is best. Avoid gel food colorings for this.

Step 1: Gather your materials

Before you officially begin, get all your materials out so you aren’t running back and forth to the kitchen. I recommend doing this experiment outside because it can get messy. If you’re doing this experiment inside, you might want to put your cups in a baking sheet and line it with parchment paper.

Fizzy Rainbow Science Experiment Materials

Step 2: Prepare your cups

Fill each cup with baking soda. Any amount will be good - but the more baking soda you add, the bigger the fizz! Don’t fill more than 3/4 of the way full because you'll want to have room for your vinegar.

Fizzy Rainbow Science Experiment

Step 3: Add your colors

Now it’s time to add a few drops of food coloring into each cup. One color per cup to create a rainbow effect. Once the color is added in, mix up your baking soda until the color is well distributed throughout. I used a long toothpick to stir. A straw would also work well.

Step 4: Add the vinegar

This is where the magic happens … this is the fun part!! You’re going to pour vinegar into each cup and watch the colors explode. Okay, not really explode … more like erupt! The baking soda reacts to the vinegar as the meet and create a fizzy rainbow eruption! The fizzy eruption doesn’t last that long, so move quickly. Add more baking soda and vinegar to get a second and third fizzy reaction.

The science behind it …

They react with each other because they exchange atoms. In this scenario, the baking soda actas as a base and takes a proton from vinegar, which is an acid. The reaction between the two materials releases gas because when the baking soda receives the proton, it transforms into water and carbon dioxide.

Fizzy Rainbow Science Experiment Quarantine Activity
Quarantine Activity With Kids Making a Fizzy Rainbow Science Experiment

My boys loved watching the colors come to life, and I hope your kids love it, too!

XO,
A.

Quarantine Activities: Free Coloring Pages For Kids

What better way to pass the time, and get those creative minds going, than with coloring! A perfect activity for a wide range of age groups, and it’s sure to keep little hands busy. I love getting my toddler involved with activities that spark creativity through self expression. Just like Billy Madison explained to Miss Lippy … he colored the duck blue because he’d never seen a blue duck! (Okay, that movie reference might be lost on some of y’all LOL)

But coloring is a perfect activity for:

- improving hand strength and pencil grip
- fine motor coordination
- helping to develop focus
- encouraging use of the imagination

So many artists and companies are releasing free coloring pages due to the Coronavirus Quarantine. I’m sharing a few with you, that I hope you and your littles will enjoy!

Daydream Society: Coloring pages inspired by their colorful party collections (many of which we carry in our shop … like these and these!)

Ashley Longshore Art: Inspirational women coloring pages

Lily Pulitzer: Coloring pages inspired by their famous prints

Crayola: Dozens and dozens of your favorite Disney characters ready to color

Brooklyn Berry Designs: Color and create your own space bookmark

Oh Yay Studio: Adorable doodle coloring pages

Canary Jane: A free nature scavenger hunt printable

Mighty And Kind Kids: A wonderful kids magazine for promoting kindness, offering a free bundle of resources for parents.

Love The Day: Lindi has opened her entire printable library, including these amazing coloring pages!

Courtney Khail: This talented watercolor artists has created a coloring page inspired by her floral work

Happy creating, friends!

XO,
A.

CREDITS
Links to the artists and companies websites listed above can be found here: Daydream Society | Ashley Longshore Art | Lily Pulitzer | Crayola | Brooklyn Berry Designs | Oh Yay Studio | Canary Jane | Mighty And Kind Kids | Love The Day | Courtney Khail


How To Host A Réveillon Dinner Party

Réveillon is a historic tradition in New Orleans, with ties to France. If you’re local to the area, you probably have heard of it, but you might not know it’s history.

The word réveillon derived from the French word meaning “awakening”. Réveillon started as a meal served after midnight mass on Christmas Eve. This tradition came to be when the city of New Orleans was almost entirely Catholic. Families would return home from midnight mass hungry, so they served a meal! These meals would be prepared in advance, waiting for families to return home from service. The menu is traditional made up of breakfast foods, such as egg dishes, pastries and breads, even puddings. But you could also find New Orleans staples like turtle soup, oysters, and grillades on the menu. The drink of choice was cordials, champagne, and wine. These dinners were an all-night affair and could last for many hours, even until dawn. But by the 1940s, Réveillon dinners could only be found in very traditional homes and was practically extinct due to the rise of other holiday traditions like, Christmas trees, purchasing gifts for children, and the craze of Christmas shopping.

Take a look at this video clip from my interview with Great Day Louisiana to learn more about Réveillon and see our table top inspiration that would be easy to recreate for your holiday celebrations!

IMG_7833.JPG

Thanksgiving Hosting Tips With "Great Day Louisiana"

I had the honor of appearing on Great Day Louisiana to talk all about hosting and decorating your table this Thanksgiving holiday. Hosting is one of my favorite things to do - which I’m sure comes as no surprise! I’m excited to have the chance to share some party planning tips and tricks to make your Thanksgiving celebration less stressful. I hope you enjoy it!

I had such a blast filming this segment, and I’m grateful for the opportunity from Great Day Louisiana. Here’s a little announcement: I’m thrilled to have the chance to return monthly to film more segments about entertaining and share some of our goodies in the Party Shop! Be on the look out for my next interview, which will air on December 4th at 9am on WWL-TV.

Laissez Les Bon Temps Rouler

It’s with bittersweet emotion that I announce a big change for The Graceful Host …

IMG_1243.JPG

We’re MOVING to ….. Louisiana!

It’s hard to even type those words. How do I leave North Carolina? The city I call home. Where my husband and I have built a life. Where we created two beautiful boys. The place where I built a business. Where I’ve fostered sweet friendships. Where I’ve grown up. The home of countless memories and experiences. Just, how??

I’ve had some time to sit on this news. I joke that I never like to do anything fast. It’s just not my personality - I’m a very analytic person who likes to think things through. So I’ve had time to process my feelings before announcing it publicly. And that’s good for me - That means I can type this without being in a gigantic puddle of tears. There’s just a tiny puddle.

So, you might be asking … why are you moving?! Short answer: My husbands job is the reason for the move. He’s being transferred. It’s a gift that we’re able to move to the New Orleans area, really, because that’s where my entire family lives. I haven’t lived in Louisiana since I moved away for college 13 years ago. And truthfully, I never thought I’d be back. I came to North Carolina and attended Elon University, and just fell in love! At the time of my college graduation, my now husband and I were engaged, and even though I didn’t have a job (hello vocal performance major! haha!), I knew I wanted to be on my own. Since my husband, Todd, got a job in Charlotte right out of college, I decided to move to Charlotte so we could officially begin our lives together.

Not going to lie. When I first moved to Charlotte, I hated it. I mean, HATED it. But it was such a different place 9 years ago. And I felt very much alone, since Todd was traveling non-stop - I was basically living alone with no friends around and no job. Since I first moved to Charlotte as a young college grad, I’ve found my place and have created a business - and life! - that I just cannot imagine leaving behind. I opened my mind to what Charlotte had to offer, and she’s never stopped impressing me. I really thought we’d never leave this sweet Queen City. It truly feels like home to both of us.

IMG_1245.jpg

It’s crazy to think about relocating, honestly. My anxiety is in overdrive, y’all! But as difficult as I’m sure this transition will be, I’m also looking forward to the change. It’s that feeling of living with paradoxical emotion, where I’m scared out of my mind about the unknown and yet, at the same time, eagerly excited for what’s to come. I will miss my friendships and vendor friends here in Charlotte deeply. I’ve had the chance to serve over 60 couples and dozens of families over the last 7 years! Not to mention work with so many talented vendors. And truly I cherish my team, who is just the best out there - Jenny, Brianna, Abby, Kasie, Chandler … I love y’all! I’m just so grateful for the opportunities I’ve experienced over the last several years being here in the Queen City.

But, there’s something to be said for starting fresh. For having the challenge of restarting in a new place, with so much experience under my belt. I do feel lucky to have a handful of vendor friends in the New Orleans area from past events. And of course, this does feel like a homecoming (for lack of a better term!) for me … because New Orleans was my first home. I truly can’t wait to reconnect with so many friends! Plus, we’ve never lived anywhere near family. So it’ll be a nice change to have family up the street, rather than a plane ride away. (Maybe Todd and I can squeeze a date night in more than just once a year! haha!)

So what’s going to happen to The Graceful Host, you might ask? I will absolutely be establishing both The Graceful Host weddings + events AND the Party Shop in New Orleans. And I cannot wait to serve brides + grooms and families in the Big Easy! If anything has come from this, it’s sparked a new fire in me. I’ve had some time to really map out future goals and make sure that I’m realigning my business with those goals. I have some big plans, y’all… I mean, HUGE! The news of the move may have rocked me in the beginning, but now … now, I’m taking this opportunity to dream bigger than ever! It’s been a difficult past few months having to turn away future business because we’re relocating, but I know in my heart that everything will work out and TGH will be better than ever in no time.

Make no mistake … this self proclaimed Carolina girl is terrified of starting over. Just terrified. But I love a challenge. And I cannot wait to have the chance to design and create in the city that gives me so much inspiration. The city taught me how to party - let’s be real. The city that molded me. And I’m very much looking forward to showing my family all that New Orleans has to offer, and to create a new home together.

So friends, my one wish is that you think of me and my family over the next few months as we make this huge life change and move hundreds of miles away from our beloved home of Charlotte.

And if you’re a bride in the New Orleans area …. I’m happily booking for 2020, and I cannot wait to get to know you better! Please give me a call!

IMG_1244.JPG

And to Charlotte, the place I call home … Thank you for all the memories! I resisted you for so long. You were patient, though. And you welcomed me with open arms when I was ready to let you in. I’ll always think of you as my home. Leaving in the Fall will be difficult, and who knows - maybe we’ll be back?! And if we do have the chance to come back to the Queen City, I have no doubt you’ll welcome me back with open arms once again. Thank you, Charlotte … for everything!!!!

XO,
A.

PS. I am still booking events through October 2019 in Charlotte! Our move will be in November, following my last wedding at the end of October. And I’d just love to help you with your event!!

Party Animals Birthday Party

Why do kids have to keep growing up?! I feel like we were just celebrating our baby boy turning one, and now I blink and he's TWO! 

After Ryan's first birthday fiesta, I swore I'd take it easy on the next birthday party. But once I decided on the theme of "Party Animals", I just couldn't hold back - there were too many cute ideas floating around! Let's face it, there will eventually come a day when Ryan doesn't want a birthday party (cue tears!), or he'll want to do something less adorable than what I have in mind. So I'm making the most of it for now! Plus, the party planner in me just can't help it.

I went with "Party Animals" because Ryan really loves animals, especially cats ... or kitty kittys as he calls them. (I think it's the thrill of the chase that he's attracted to, really!) Once that theme clicked, the ideas started rolling in.  Tiny animals wearing party hats, a big colorful balloon garland, tails on chairs, a primary color palette, tambourine favors - the possibilities for decor were endless. A lot of love went into this party. The two major (and easy!) DIY projects were the tiny party hats for the mini animals and the colorful balloon garland decor. Tedious projects, but honestly they really only took a few hours each, and the end result was well worth it!

General party tips to parents: I'm a big believer in renting certain items to make life easier on the host(ess), like linens, tables and chairs. I personally don't want to have to invest in purchasing those things and then storing them. I also recommend outsourcing catering. It is 100% worth it! We went with BBQ, at my husbands request - and I love it because it was easy for guests to eat, crowd pleasing and it's filling. And yes, even a kids birthday party needs a signature drink! It's perfectly acceptable to serve alcohol at a kids birthday party. You want to cater to your guests - adult and children, alike! Our two signature drinks were Zoo Water (a non-alcoholic option) and Jungle Juice (an alcoholic option).

This was such a fun party to design, and I'm really excited to share it with you!

You can recreate this party, too, using the Party Animals party kit in the shop!

Sources:

2017 Year In Review

What a whirlwind year. Hard to believe we're saying goodbye to another year. 2017 was a good one. Lots of beautiful weddings, great memories & experiences, and valuable lessons.

A peek at our Top Nine that I shared on Instagram!

A peek at our Top Nine that I shared on Instagram!

I had the honor of working with some amazing couples and their families, as well as some insanely talented vendors. I produced an event with Crate & Barrel for engaged couples, re-launched The Graceful Host calligraphy shop on Etsy, designed a beautiful styled shoot that was featured on Style Me Pretty, had 12 press features with Martha Stewart weddings, Style Me Pretty, Carats & Cake, InStyle Weddings, Inspired By This, Borrowed & Blue, Loverly, and Brit & Co, and even had my sweet baby's nursery featured on Inspired By This. It was one hell of a year, y'all!

As I reflect back on our year, I can't help but feel overflowing gratitude for the couples who chose us to be a part of such a special time in their lives. That trust to produce their dream wedding means the world to me! Here is a peek at some of our 2017 highlights:

Ellyn + William at Trump National Golf Club// photography by Old South Studios
As seen on Carats & Cake

Alyson + Matt at Champagne Manor// photography by Perry Vaile Photography
Coming soon to Style Me Pretty

Maggie + JR at the Ritz Carlton ballroom// photography by Cheyenne Schultz Photography
As seen on Carats & Cake

Lauren + Mark at Duke Mansion // photography by Almond Leaf Studios
Just a sneak peek ... full gallery reveal coming soon!

Emily + Billy at the Mint Museum Uptown // photography by Crystal Stokes Photography
Just a sneak peek ... full gallery reveal coming soon!

Phew - what an incredible year! :) Thank you from the very bottom of my heart for following this journey, and for your support and encouragement along the way.

I am eagerly awaiting all that 2018 has to offer, and the amazing celebrations we are busy planning for our couples! I have no doubt that 2018 will be oh so sweet!

I wish each of you a happy and healthy 2018! I hope the promise of a new year and new beginnings brings you peace and hope. And that your new year is full of celebration! 

XO,
A.

A few of our other 2017 press features:
Martha Stewart Weddings - 12 Tips for Planning a Monochromatic Wedding That Isn't Just White
InStyle - Don’t Start Your Wedding Website Before Reading These 9 Tips
InStyle - How to Create Unique and Beautiful Boutonnieres
Brit & Co - 14 Wedding Trends That Are Going to be BIG in 2017
Inspired By This - 20 Bohemian Brides Who Nailed Free-Spirited Fashion
Inspired By This - Monogramed Wedding Details That Aren't Preppy
 

Celebrating Five Years of The Graceful Host

It's hard to believe, but it's been 5 years since I've owned this wonderful business. F-I-V-E years. Holy wow! Who would've known the impact this decision on December 31, 2012 would have on my life, and all the places it would take me, the people I'd get to meet, and the opportunities I'd have at my finger tips?!

In 5 years, I've learned so much. Not just about business and entrepreneurship, but about myself. And I think the later is really important. 

In 5 years, I've had the honor of executing 64 weddings. That is 64 couples that have trusted me with their special day, that I've had the pleasure of getting to know and to witness their start as Mr and Mrs.

Photography Credit: Lauren Rosenau Photography

Photography Credit: Lauren Rosenau Photography

In 5 years, I've had highs and lows. I've been praised and I've been criticized. I've had epic successes and I've made embarrassing mistakes. But I see every thing as an opportunity for growth. Whether the experience was good or bad, I've learned from it in some way.

In 5 years, I've had the opportunity to work with countless vendors who are beyond talented. Who have supported my business, encouraged me every step of the way, and inspired me, too.

In 5 years, I've had weddings featured in countless magazines (both regional and local), national blogs, and hardcover coffee table books, such as The Knot Carolinas, Style Me Pretty, Inside Weddings, Carats & Cake, Southern Weddings, Ruffled, Trendy Bride, and Carolina Bride. And I've been interviewed and quoted about wedding trends and etiquette advice. 

In 5 years, I've learned my "why". As in "why" I do what I do, despite the many challenges I face in todays saturated wedding market. As in "why" I fight so damn hard to earn my couples business. As in "why" I want to stick around for another 5 years (or more, God willing!).

In searching for my “why”, I realized why I was drawn to this career in the first place. It took me a while, but I figured it out! If you're in the creative industry or familiar with small business, then you probably know that 50% of small businesses fail to reach year 5. And the percentage ticks up dramatically after that. So it takes more than just showing up to survive entrepreneurship. It takes courage, passion and heart. When I feel like I can't take this job for one more day - and believe me, I have my moments of wanting to toss the towel - I think about my “why”.

For a while, I didn't really have a “why”. And without it, I was completely burned out. I had no boundaries. I had no sense of direction for my business. I had no control over my future. But overtime, I've discovered my “why”... And it's people. I show up because making people happy is what I love to do. I pour my heart and soul into The Graceful Host because I want to make other peoples lives happier and easier. I have a passion this career because I get the chance to make a difference during an important part of a persons life - as well as their families life. 

It's my hope that by giving it my all, 110% of the time, that I can make a difference in someones life. That I can turn an experience, known for being overwhelming and stressful, into a memory that is happy. That’s a big thing that I hope our brides and grooms take away from their experience with The Graceful Host.

Photography Credit: Lauren Rosenau Photography

Photography Credit: Lauren Rosenau Photography

I can't believe that I've been doing this for FIVE years. It's so cliché, but it really does feel like I blinked, and then poof - here I am! It's been a wild roller coaster ride. And yet, I wouldn’t change a thing, and I’d happily do it all over again in a heartbeat. While I do consider The Graceful Host to be an expert in the field of wedding planning + design, I definitely don’t think that I have all the answers to running a business, or know everything there is to know about this career. I call myself a forever student because I’m always trying to learn whatever I can and ask as many questions as I can so that I am able to better serve others. That being said, can I say ... I'm just so damn proud of how this company has grown and evolved over the past five years! So much blood, sweat, and tears have gone into building this business. And I’m just really proud to be celebrating FIVE years.

So, to every bride + groom who has trusted The Graceful Host to produce their dream wedding. To every vendor we've had the pleasure of collaborating with to create some serious magic. And to every person who has supported me, encouraged me and followed me through this crazy journey ... especially my saint of a husband, Todd ... a sincere and heartfelt THANK YOU! Words will never be enough. It is because of those 64 couples that I can celebrate five years of business ... and that I'm even sitting here writing this blog post. I feel so lucky to be able to do what I love every day, and to get to meet + work with such amazing people.

With a heart full of gratitude, I raise my glass to you and say THANK YOU!

Photography Credit: Lauren Rosenau Photography

Photography Credit: Lauren Rosenau Photography

Each year of business gets better and better. 2017 was absolutely amazing and I’ll be sad to see it go. (I have my annual recap of our year coming soon.) But, I’m ready for you 2018! I cannot wait for all the exciting things I have planned to come to life, and to see some truly wonderful couples say “I Do!”

What's in store over the next 5 years for The Graceful Host?! That's a great question! With the end of every calendar year, I take time to map out my goals and ideas for the next calendar year and several years down the road. And with the addition of calligraphy and The Graceful Host Etsy shop, it's even more important that I write these things down so that all my crazy ideas can be given direction that align with my overall goals. (I encourage everyone to do the same thing ... whether you own a business or not!) So, I can't wait to dive into some goal setting over the weekend. I have so many thoughts, and I honestly just can't wait to see what the future holds!

Cheers to five years, friends!

XO,
A.


Dear Jane

It's been a year since I met you. And I've never shared this story. I thought maybe this wasn't the right place to share, since this isn't a personal blog, but rather a business blog to share all things wedding and celebration. But, it's a message that I think needs to be shared.

You might not know it, but you saved me that day. You saw me when no one else did.

Everything was piling up and it just felt like I couldn't breathe. Every day was getting harder than the next. It felt like the end of the world, but you helped bring me back to reality.

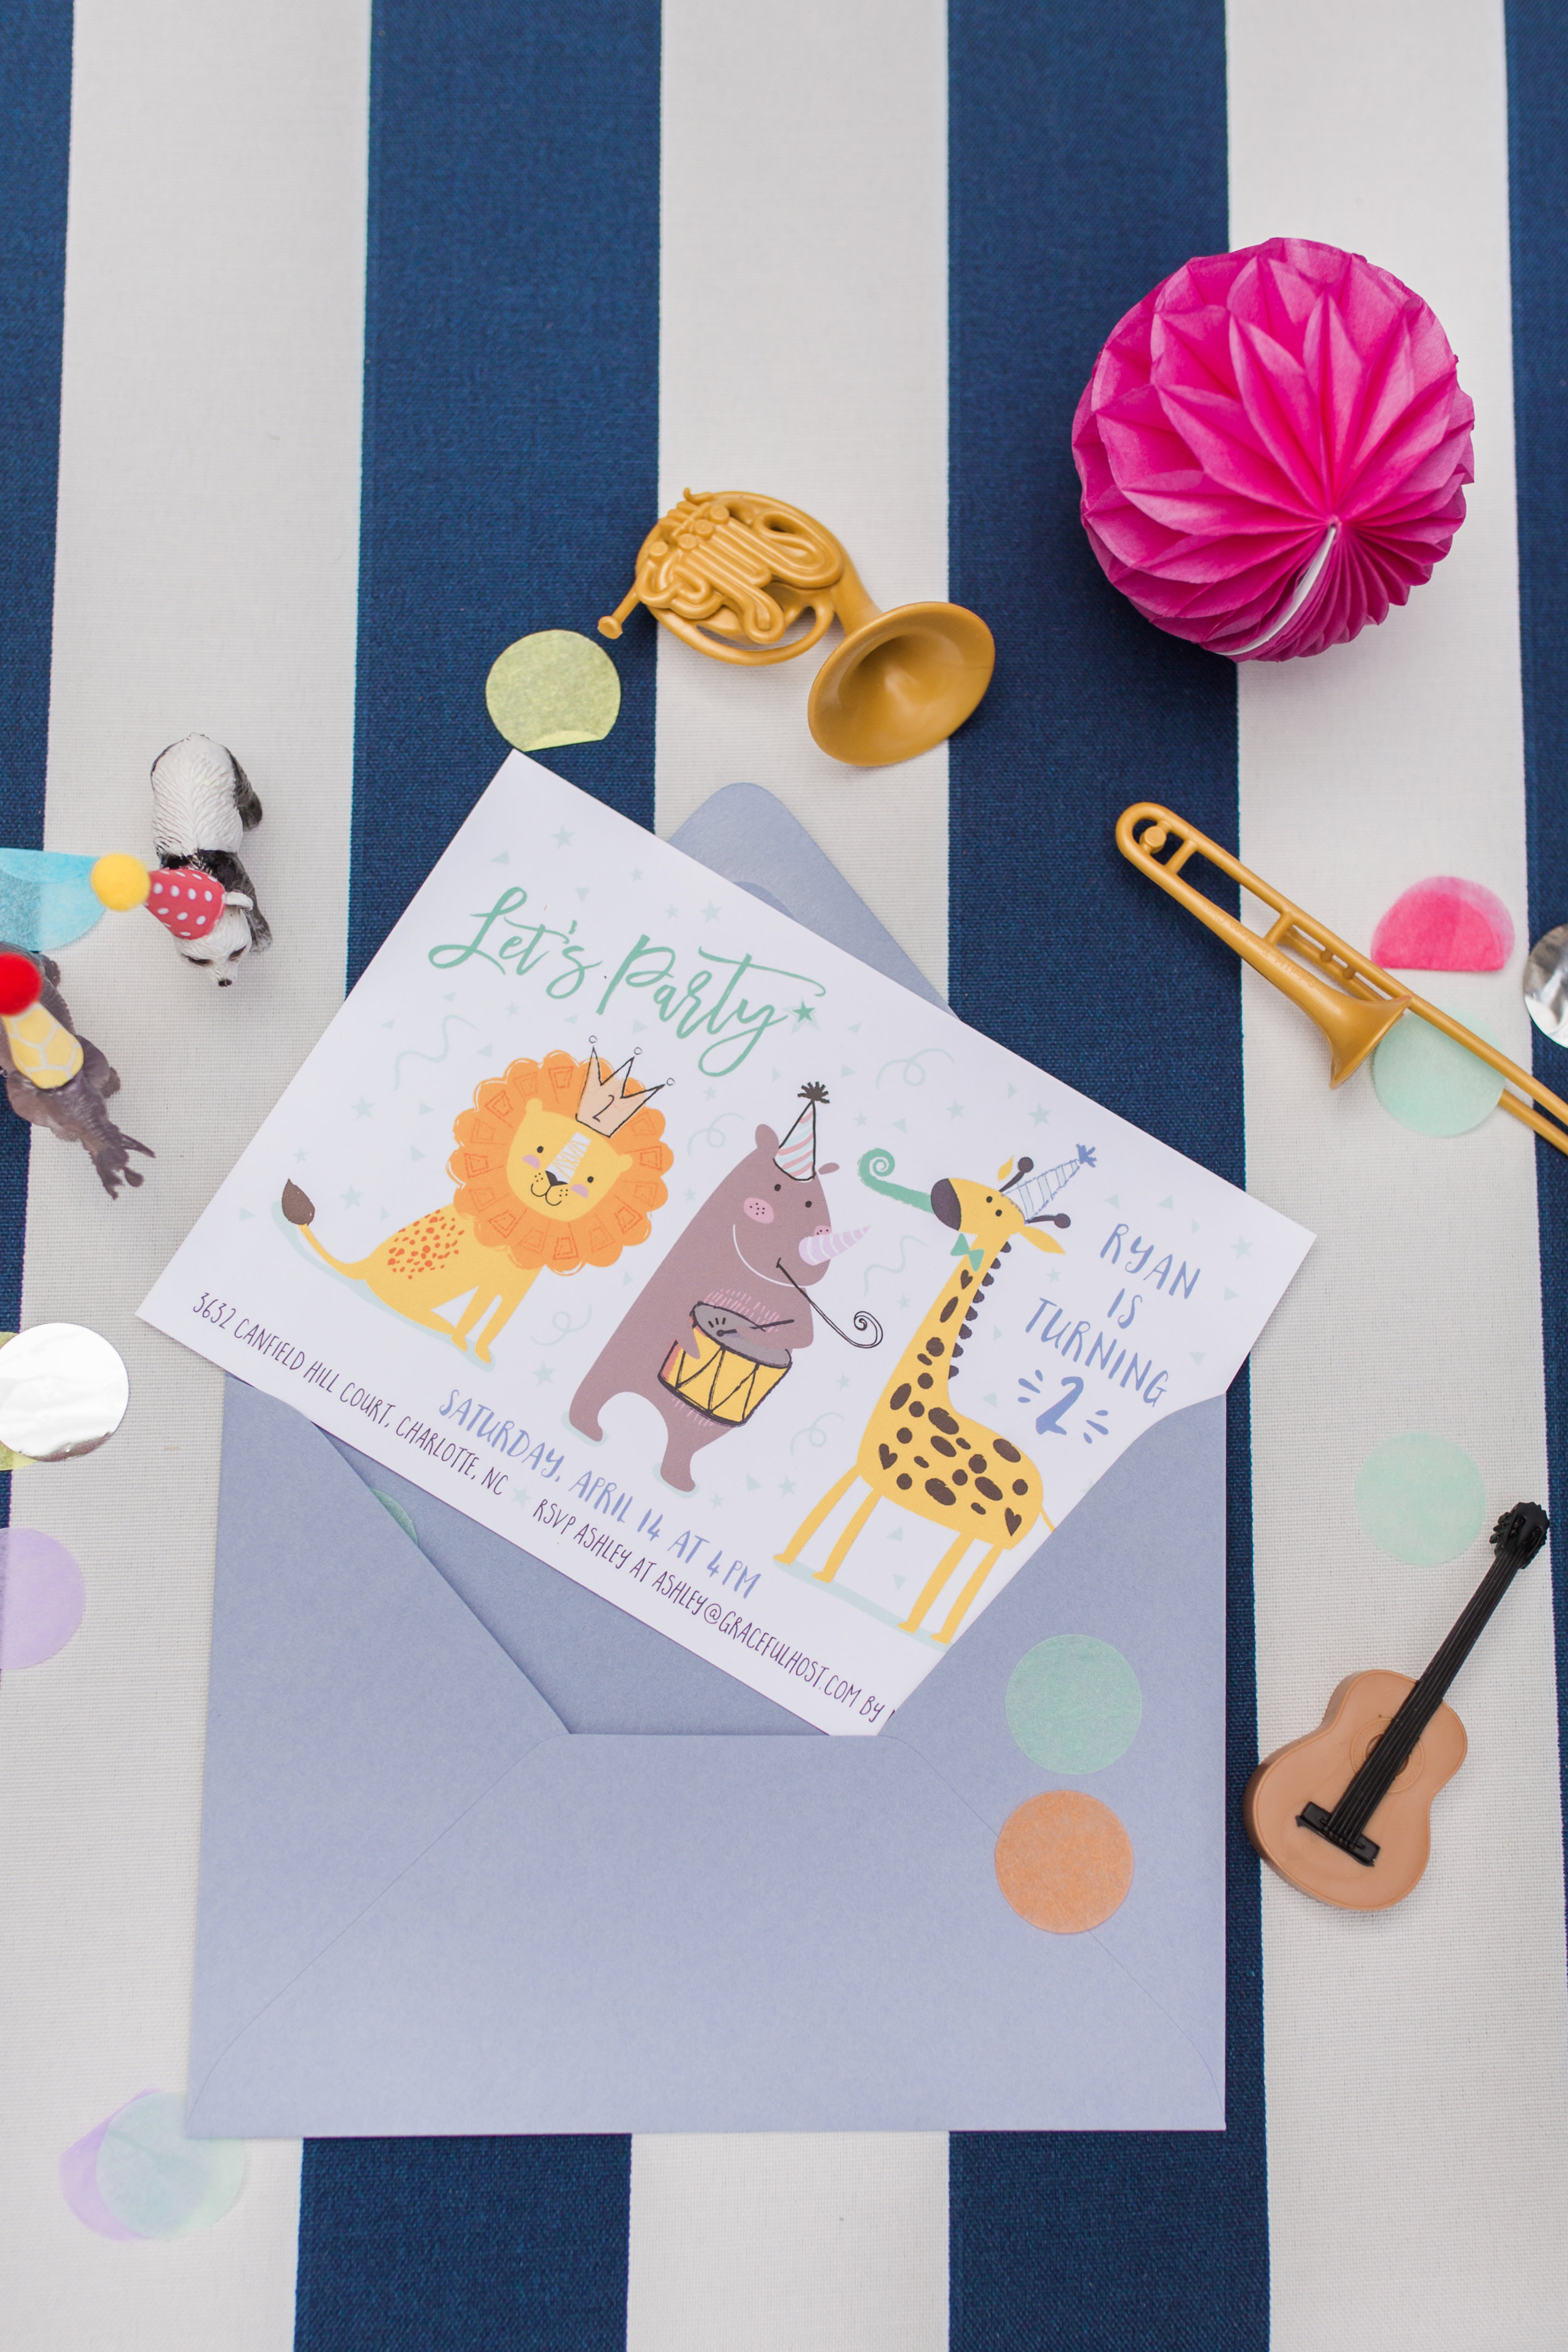
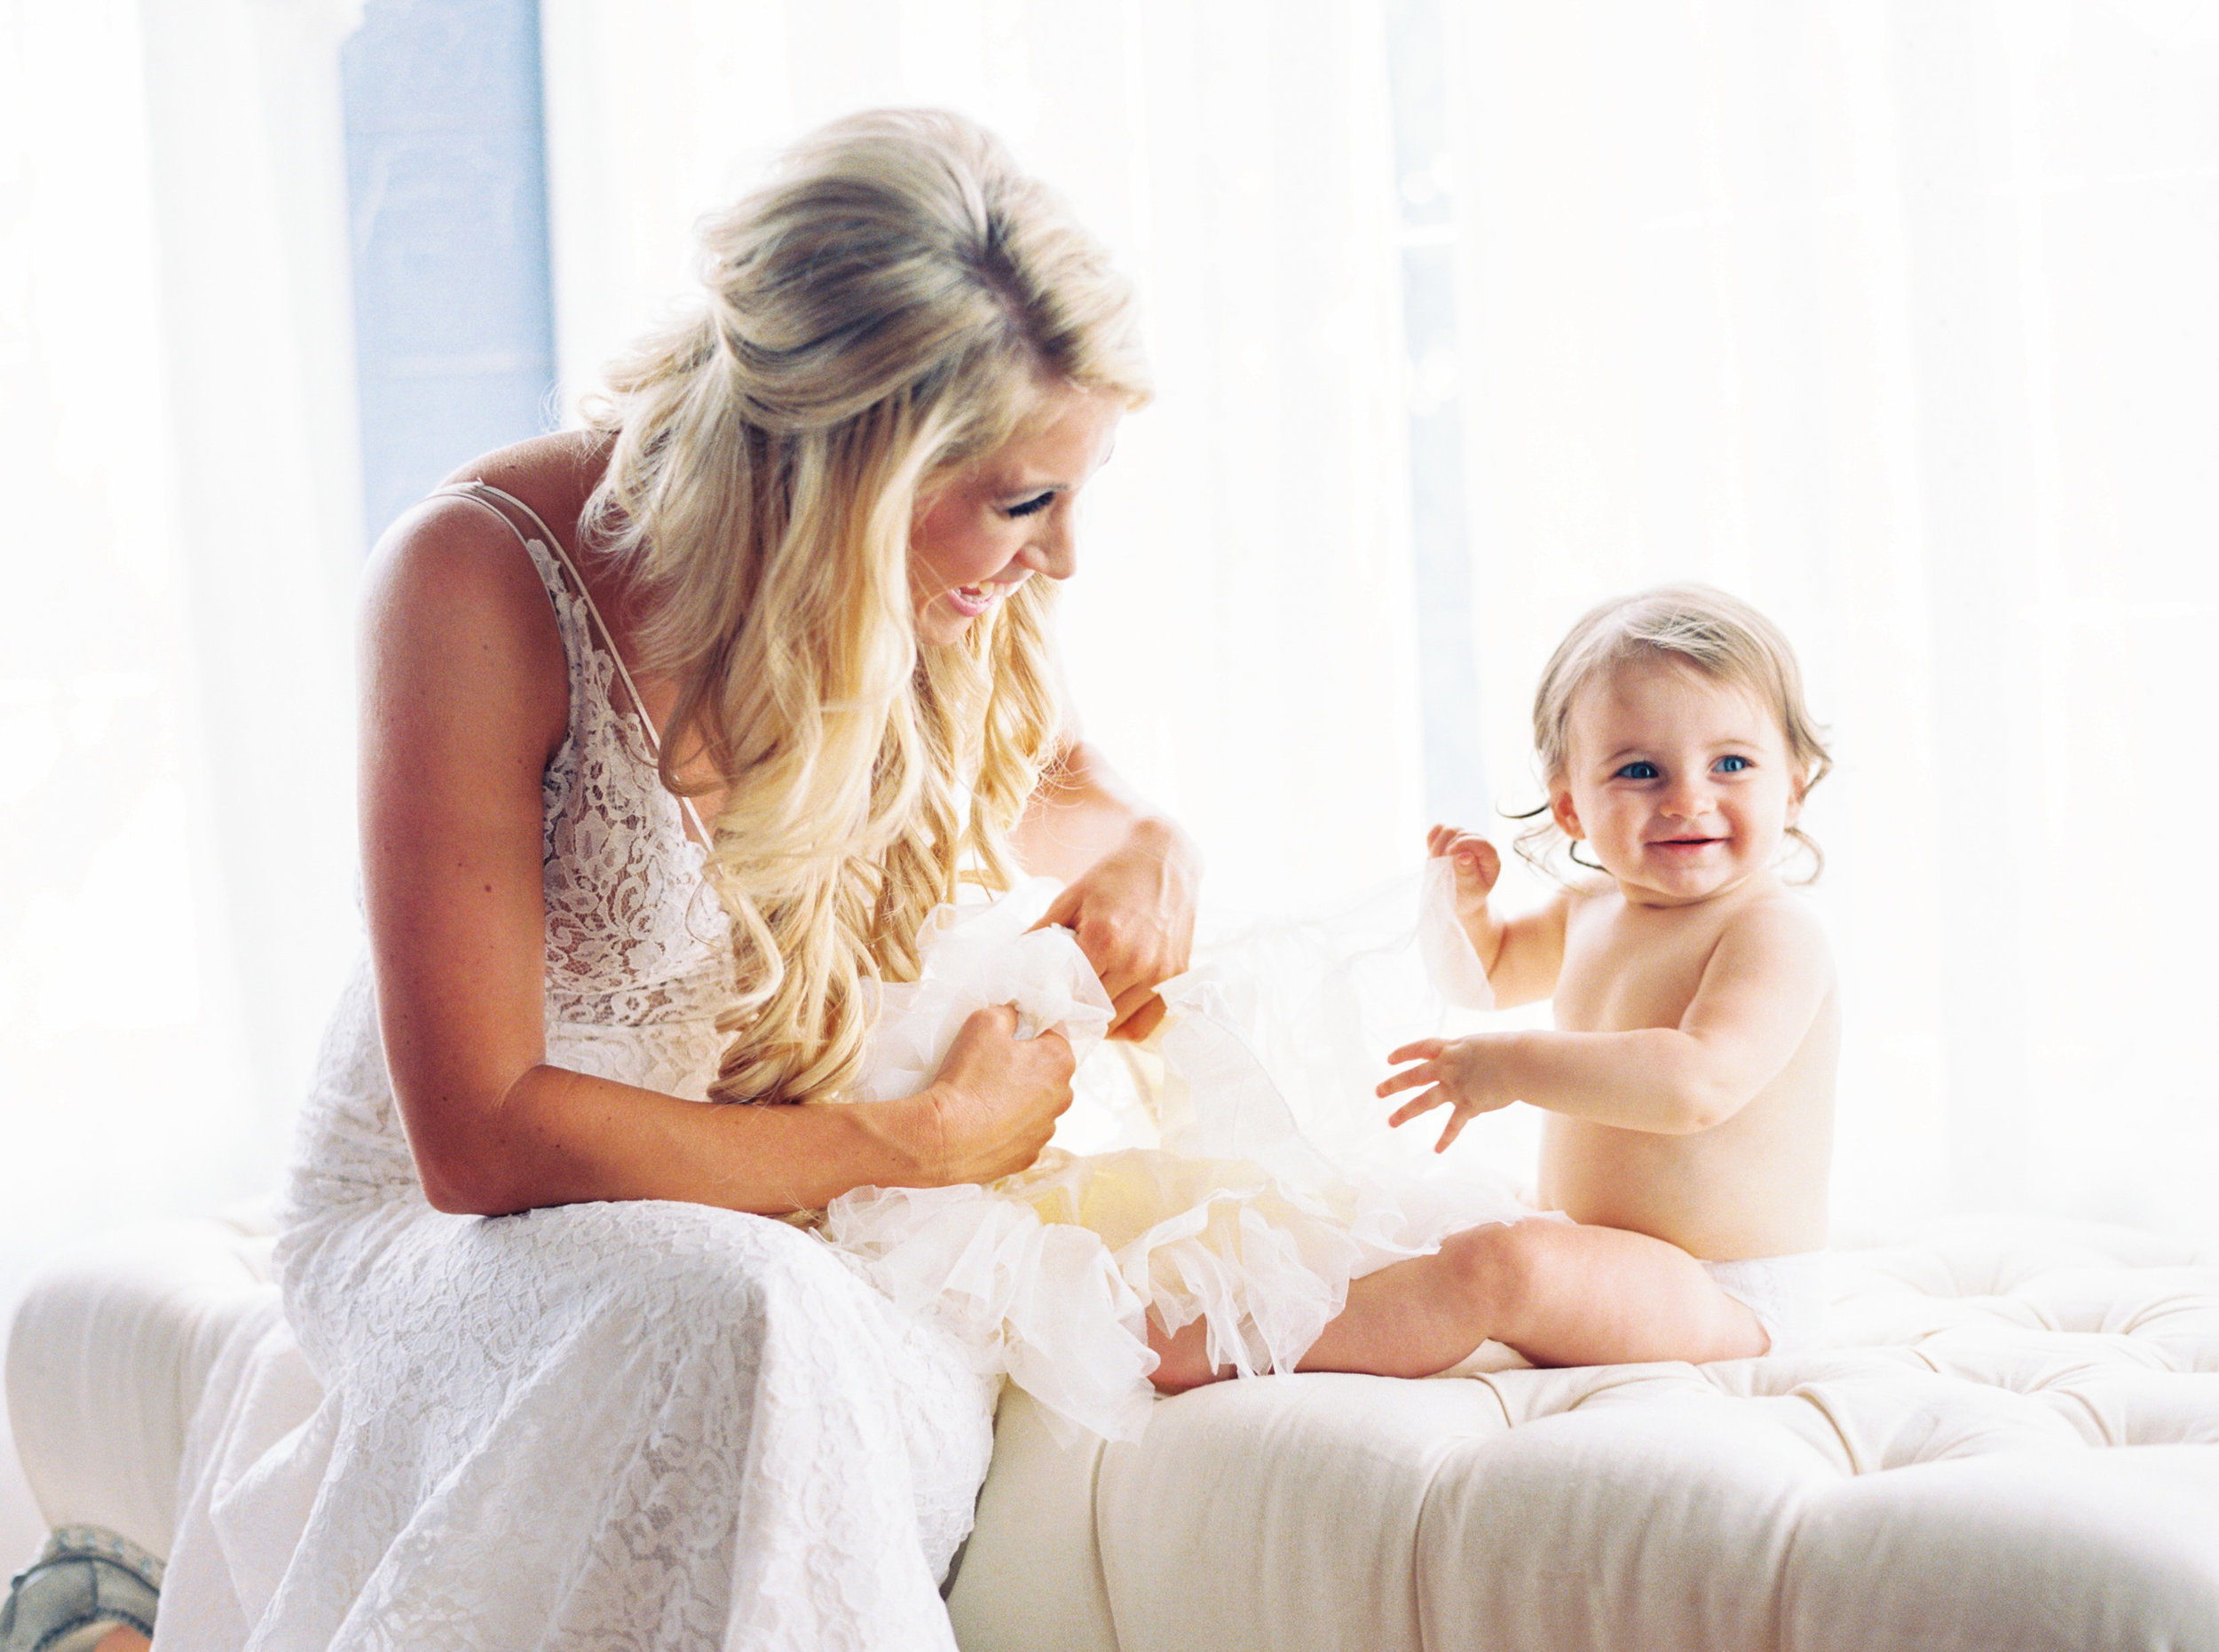
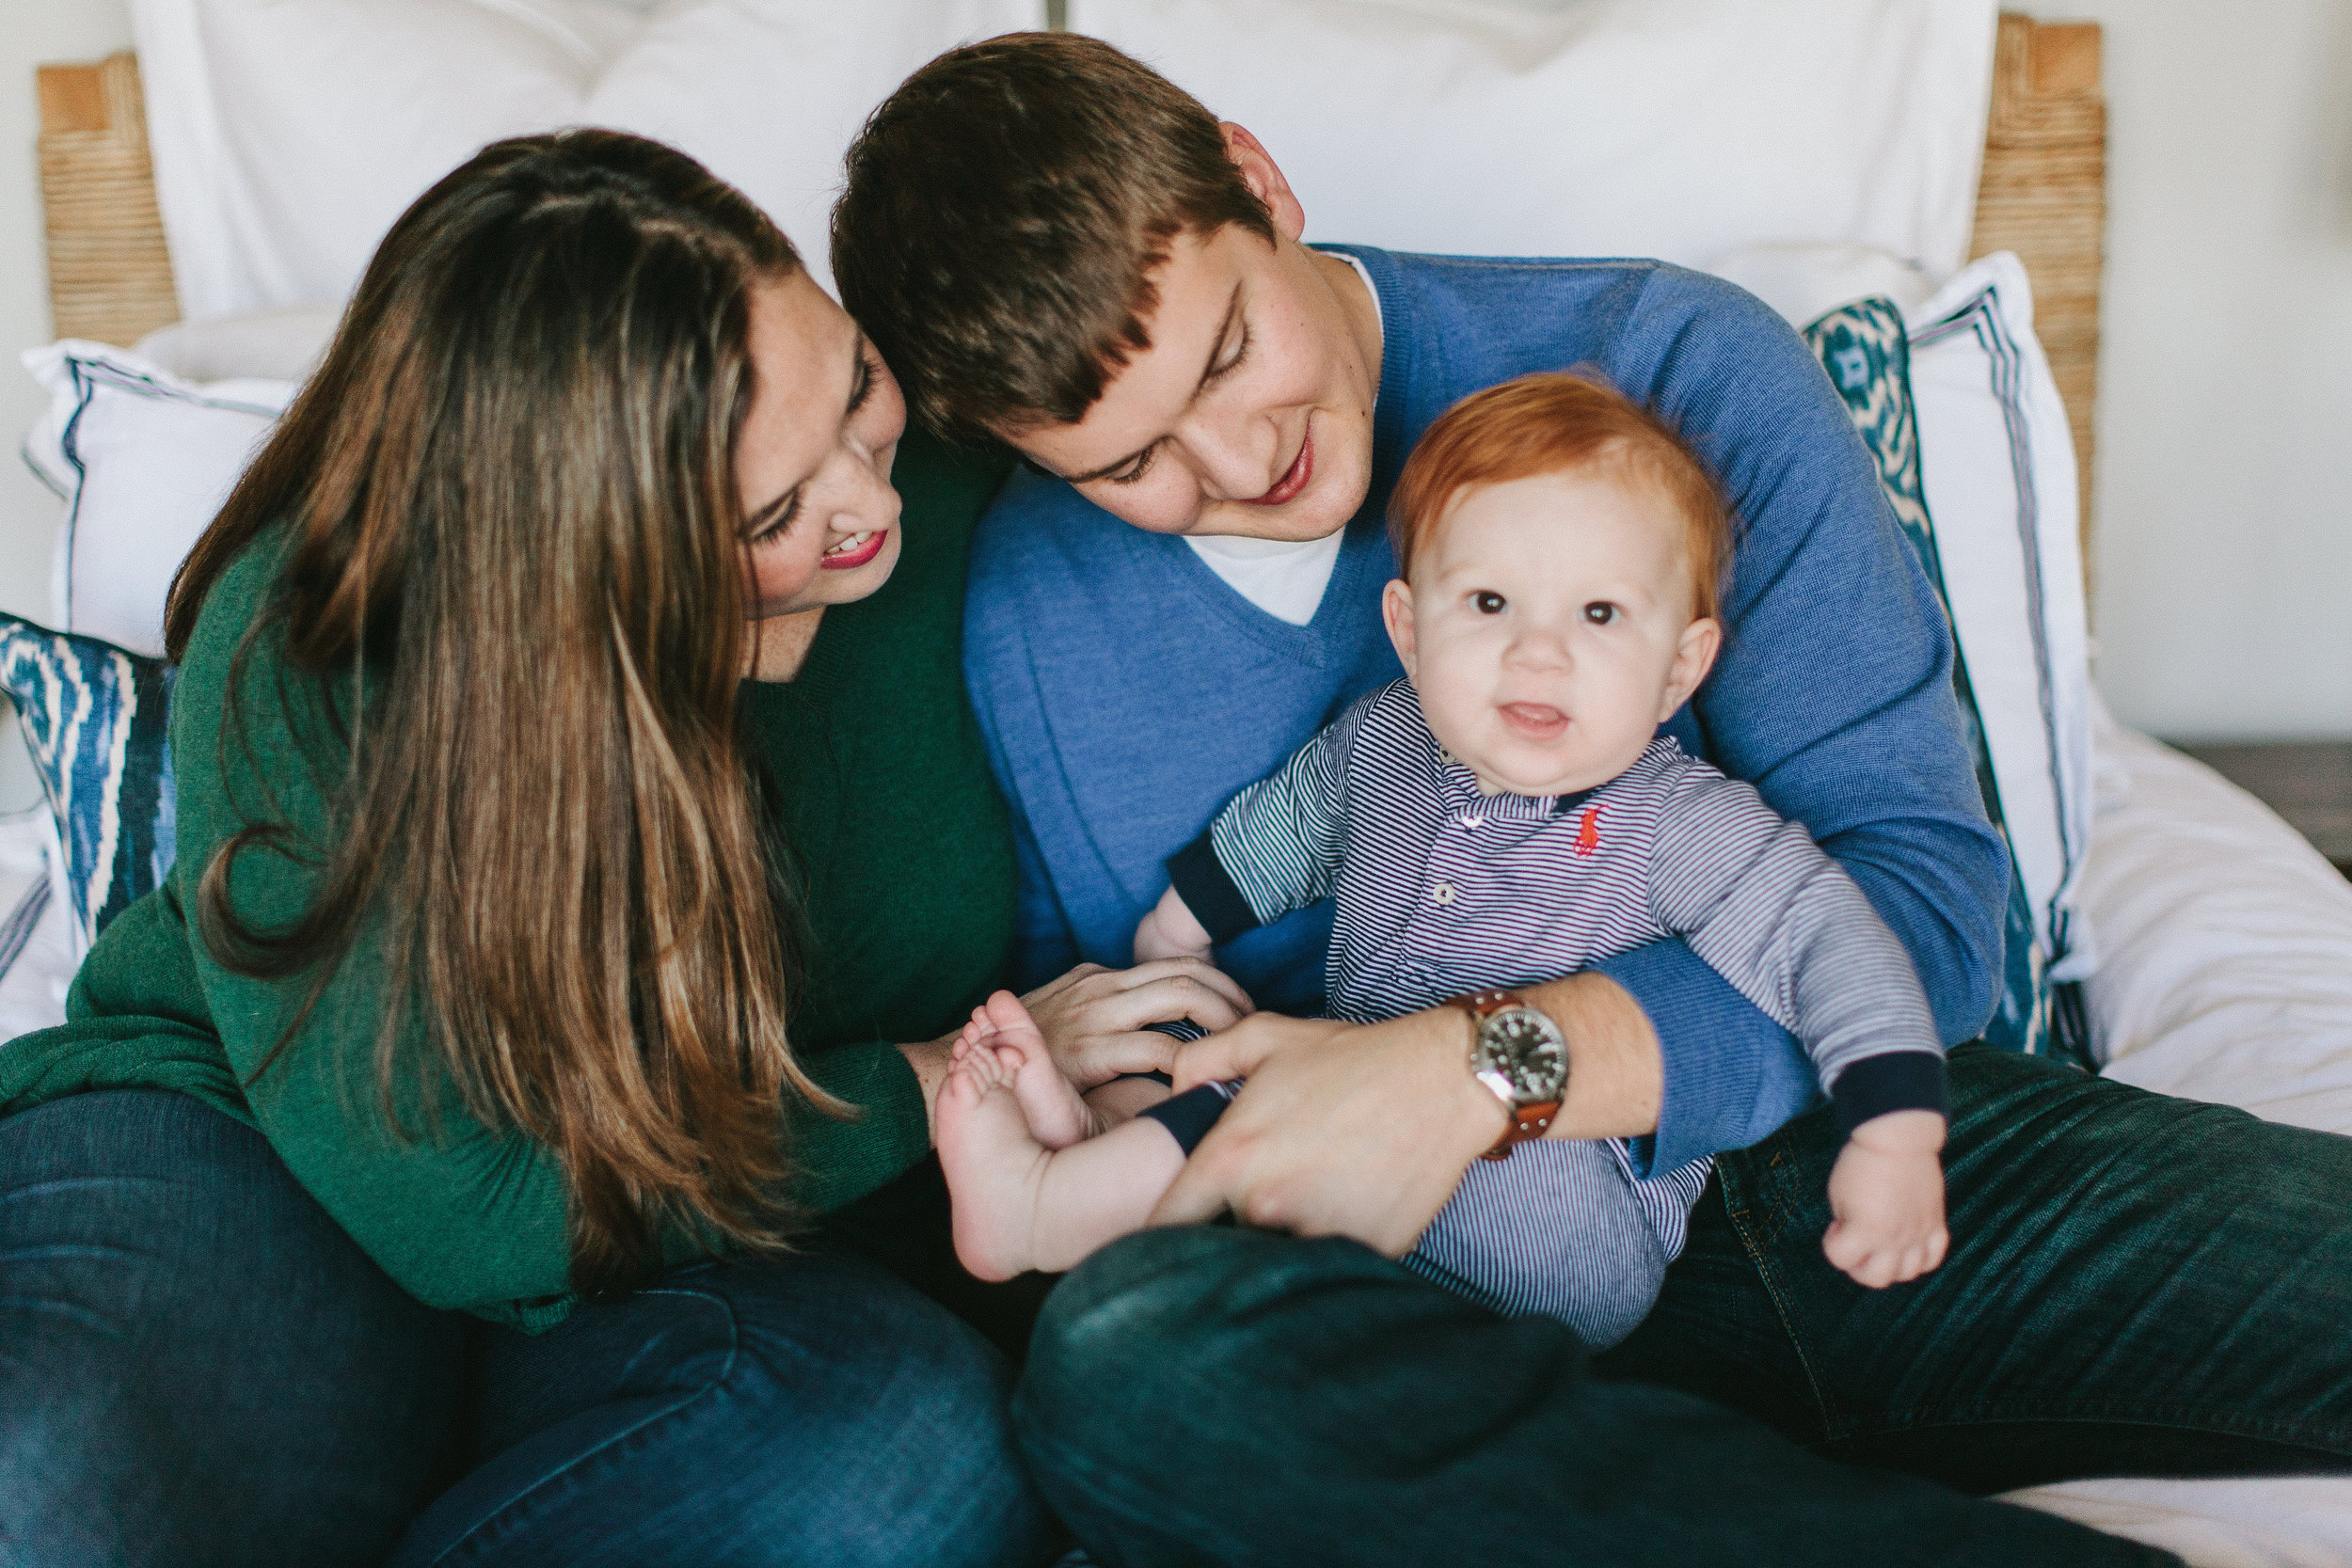
When we met, I was at my lowest. I didn't know it at the time, but I was in a deep post partum depression. I didn't think it was possible to have "baby blues" 8 months post partum, but apparently it is possible. My husband and I welcomed our sweet baby boy in April of 2016. He was a dream come true. For as long as I could remember, I wanted to be a mom. And Ryan made me a mommy - the happiest day of our lives. Adjusting to life with a baby was not easy for us. Our lives were flipped upside down. I didn't grow up surrounded by a lot of children, and I was one of the first in my friend group to have a baby. So, while I knew things were going to change and that it would be hard - I had no idea it would be like this. The first 48 hours will go down as the most frustrating, challenging and down right scariest days of my entire life. I got 2 hours of sleep, during our two-day stay, before leaving the hospital with our baby boy. And coming home wasn't any easier.  Sleep deprivation, pain intense from breast feeding, and the insane hormonal shifts were my new norm. I cried so much that there was no more tears left. I kid you not ... Dry crying is a thing. And I actually never took a maternity leave because he was born during the middle of a busy event season. In fact, I was executing a wedding 17 days after Ryan was born. It's not that I was forced into not taking a time off. My clients are very kind people. But I felt that I had an obligation to them, one that came long before Ryans impending arrival, and as a business owner I made a choice. Was it the right one? I don't know. But it felt like the right one and it was a choice I made.

For months, I juggled baby and business. And it was quite a juggling act! I had no idea what I was doing as a mom, and no idea what I was doing as a business owner who now has the title of mom added to it. So, I learned on the job. Some things got easier. And some things got harder. Such as my guilt around being a mom who was focused on her work. It started getting more intense as the months went on. There were nights that couldn't hold Ryan because I felt like he resented me. A tiny baby ... I know, it's insane. And that typing that makes me feel crazy. But it's how I felt. I just knew that he was starting to hate that my focus wasn't 100% on him all day. Because I had work to do, we didn't get to attend music classes, or baby and me yoga, or take trips to the park. Or at least,i that is the story my mind made me believe. I would refuse to hold him, or kiss him goodnight because I just knew he didn't want me. I wasn't good enough for him. He deserved better than me. He deserved a mom that could give him sensory play activities, and play groups with peers. I couldn't give him what he needed. I was failing as a mother, in my mind. And our minds are really powerful. I had this entire negative tape playing on a loop like you wouldn't believe. But when you're in the fog, you don't realize that these words are a lie. They seem so real. And reality is hard to distinguish from fiction. My husband is a wonderful and loving man. He knew something was up immediately, but like a lot of significant others, he wasn't sure how to handle this ... shift. He would always tell me that what I'm feeling is not true, and give me tons encouragement. But I didn't believe him. It felt like he had to say that as my husband and that he really didn’t feel it in his heart that I was a good mom.

As the the end of the year approached, all these feelings started to intensify. And handling it got to be a bit much. I was losing control. We travel every year for Christmas, and this year was no exception - even with a baby. We decided that my husband would drive down to Louisiana from North Carolina with all the stuff (since a 11 hour drive would've been torture with an 8 month old), and Ryan & I would get on a plane and fly down for Christmas. This meant that my husband had to leave the day before. So I had to have everything prepared in advance. And as those that have ever traveled with a baby know ... they have a lot of crap to carry around! As my husband was leaving, my laptop went on the fritz. My laptop is my everything. My entire business was on that device. I had so much to accomplish so that I could go out of town to see my family for the holidays, and December is one of the busiest times for event professionals (hello engagement season!) - and my laptop (that was practically new!) was giving me trouble. Some of you might remember my struggles. And for me, it was the last straw. Nothing felt right and this was one more thing I had to deal with. I just couldn't. I had officially lost control of my life. And that was scaring me.

Even after spending hours on the phone with Apple support, I was getting nowhere. So, in a desperate attempt to control things, I marched down to the Apple store at SouthPark Mall bright and early the next morning. There were no appointments available and I had a flight that afternoon, but I was determined to fix this problem. Fixing this problem would make everything better. Or so I thought. I arrive at the Apple store, and of course they can't help me without an appointment. They offer to put me on a wait list. I accept. I only had about an hour to wait because Ryan had to be home for nap time and I had to catch a flight after he woke up. So I sat on the couches outside the store. And the weight of everything started to get to me, again. I couldn't stop the tears. There I was on December 22, 2016 ... three days before Christmas, in a very busy mall ... and I'm crying, with my baby by my side. I felt pathetic, and that made me cry even more. I literally couldn't hold back tears. I sometimes think about how many people walked by me on that day. Maybe they noticed me, maybe they didn’t. But you did. You stopped.

You saw me. You touched my shoulder and said hello. You didn't want to alarm or disturb me. But I didn't mind at all. You asked me if everything was okay, and I didn't know how to answer. I mean, yes everything was okay. But at the same time, nothing was okay. I just had no idea how to express it. You asked for my name, and gave me yours. "I'm Jane. It's nice to meet you." You said that you didn't know why I was crying, but that you saw me sitting here and felt called to reach out. You shared with me that just last year you lost your husband to a sudden heart attack. And that your first Christmas without him was lonely. I immediately felt humbled. Who am I to cry about a material object like a broken laptop? I have a wonderful life, and an amazing husband, and a healthy and happy baby boy. Isn't that all that mattered? Shouldn’t I be happy? She told me that it's okay to feel pain, regardless of the cause. I think you knew something I didn't. I thought it was about the computer, but it wasn't. You asked me if you could pray over me. And I said yes. We sat down in the middle of a busy mall three days before Christmas, and you prayed for me. Me. Who was I to deserve this kind of treatment? You walked away and my heart felt lighter. I kid you not. Did you know that the name Jane means "Gift From God". I truly believe that you were a gift from God. A gift I didn't know I needed. I called my husband after our interaction, and he agreed that you were a gift. You gave me a message that I desparately needed. You helped lift me from my fog. And from that day on, whenever I would feel myself slipping back into a bad place or like life was too much to handle, I think of you. I think of the way you saw me, when it seemed like I was invisible to the world.

This year has been challenging in its own way, with the launch of a new business and a (now) very busy toddler to look after. And every time I feel overwhelmed, I think of you. I picture your face and your very sweet and comforting smile. I think you'll be happy to know that I'm not letting my mind get the best of me any more. I am enough. I am a good mother. I am a good wife. I am a good business owner. I am not invisible.

So Jane, thank you for seeing me. Thank you for taking time out of your day to talk to me. Thank you for lifting me from that fog.

During this season of hustle and bustle, I hope that I can pass on your message of self-worth to other women (and men) who need to be seen, even if they are in a deep fog.

Gratefully yours,
Ashley

Holiday Entertaining Guide For The Newlyweds

The official countdown to Christmas is on, y'all. There are only 11 days until one of the biggest entertaining holidays of the year. (And I don't know about you, but I feel so unprepared! Time really flies!) So, what do you buy for the newlyweds who are celebrating their first married Christmas? Or the engaged couple who are about to walk down the aisle? 

 
holiday entertaining guide for newlyweds, christmas decoration, holiday place setting, holiday tablescape, holiday centerpiece idea, christmas table decoration
Holiday Entertaining, Christmas Holiday Tablescape, Holiday Placesetting, Christmas Centerpiece
holiday entertaining guide for newlyweds, christmas decoration, holiday place setting, holiday tablescape, holiday centerpiece idea, christmas table decoration
 

Choosing gifts for newlyweds can always be difficult.  But you can never go wrong with personalized gifts! From city or state-themed to a classic monogram, it's a thoughtful gift that couples don't normally purchase for themselves. It seems we always tend to cater to more guests than normal during the holiday season, so stocking up on the essentials is key to an easy, breezy holiday entertaining season. Cheese boards and serving platters, extra glasses, bottles of wine or champagne, and extra candles are always needed and make great gifts.  But don't forget about the fluffy and fun gifts for the serial host(ess) - like an Instax camera, or vegetable spiralizer (personal favorite!), or a great coffee table book all about entertaining!

(To view an item, just click the photo!)

If you're looking fora  great place to start your registry wish list be sure to check out Zola. Zola makes it so easy to share your registry with family and friends! All your lists are in one easy place, and you can also register for non-traditional items such as honeymoon funds and experiences. A really great resources in wedding planning for todays modern couple! 

So, tell me - what is your go-to gift for the host and/or hostess?!

XO,
A.

Tablescape Photography: Paige Winn Photography | Florals and Design: The Graceful Host

The Perfect DIY Holiday-Inspired Cocktail

Who's ready for holiday parties?! You can't tell, but my hand is currently raised.

DIY Ornament Holiday Cocktail

It's no surprise, I'm sure, but I love parties. Like, you know how Buddy the Elf loves Christmas? Well, that's how I feel about parties! Since having Ryan (now a year and a half old ... holy moly, how did that happen?!), we don't get out much. Sad, but true ... #momlife. But it doesn't mean my love for parties has dimmed even slightly.

One night I was thinking of ways to fancy up my Friday couch session, and thought - hey, wouldn't a fun cocktail make this laid back night feel more exciting?? And that's how this Cran-Raspberry Vodka Fizz was born. I'm no mixologist, though. This is inspired by a drink created by One Sweet Mess, because I prefer vodka over gin.

You'll need:
yields 1 serving
1oz Vodka
1/2oz Cointreau or Triple Sec
2oz Cranberry Raspberry Spritzer (I found a great one at Trader Joes) OR you can use cranberry sprite
~1tbsp Orange juice (I squeezed 2 orange slices)
2 Rosemary springs
Cranberries for garnish
Cocktail shaker
Ice
Glass ornaments, large (I found these at my local Michaels)
Acrylic paint pen, oil-free (I used Sharpie brand to letter these)

DIY Holiday Ornament Cocktail

First up, time to do some faux calligraphy! Take your acrylic paint pen and write anything you'd like on the ornaments. I was going for a Holiday vibe, so I went with Holiday-ish stuff. But you can write your name on it, or your guests names, if you'd like to personalize them a bit more! The paint should be dry after about 3 to 5 minutes, so let it sit while you move on to step two. (Pro tip: if you mess up your lettering, use rubbing alcohol on a cotton ball to take off the paint and just start again.)

Now it's time to make the drinks! Take your shaker and add in the vodka, cointreau or triple sec, and rosemary sprig. Give the rosemary a little shake prior to adding it to the shaker to bruise it a bit, or you can muddle the sprig  just a little to release some fragrance. Add in some ice, the cran-raspberry spritzer, and a few squeezes of orange. Give it all a really good shake. Pour the contents of the shaker into the glass ornaments. Add in a fresh sprig of rosemary for garnish and a straw, so it's easy to drink. You can even pop in a few cranberries for extra garnish.

The tart of the cranberry mixed with the sweet of the orange makes this drink extra delightful, and really refreshing!

DIY Holiday Ornament Cocktail

Cheers, y'all! And happy shaking! 

XO,
A.

Photography credit: Paige Winn Photography


7 Secrets to Creating Your Wedding Registry


Registering is one of the highlights of wedding planning. You get to go to store you love, and dream about all the fun new things your loved ones will gift you to fill your home, as you begin a new life together as husband and wife. Sounds dreamy, right? It also sounds really daunting. Sure, you're an adult now. And you probably know your way around a kitchen - or at least how to find the kitchen. But what do you really need? How many stores do you need to register for? Is there anything off limits when it comes to registering? We're sharing 7 tips on how to create your wedding registry that will answer these questions, and more!

acrylic welcome sign, handlettering, calligraphy welcome sign, crate and barrel wedding registry, how to register for your wedding, wedding registry tips, crate and barrel, wedding planning advice

#1: Take inventory
You won't know what you need until you know what you have (or don't have!). Go through each others household goods (i.e. kitchen items, bathroom items, bedroom items, etc.) and see what you would like to keep and what you want to throw away, donate, or sell. Now is a great time to get rid of the dishes you've been using since collage, or to ditch the pans that have seen better days. And as you go through your belongings, you'll also realize what you use a lot of and what you don't use a lot of. Let that guide you as you create your registry. Your sister might be a big baker and have cabinets full of cookie sheets, mixers, and cake pans, but maybe you're not - so don't fill your house with things you won't use. Your registry is a great way to upgrade your household goods and appliances.

#2: Editing is okay
Just because you went to the store and scanned it doesn't mean it needs to stay on your list. Maybe you get home an realize that you don't want a new coffee maker because yours is just fine and you don't make coffee at home very much anyways. You can access your registry list online and make edits. It's always good to keep checking in on your list to see how things are going. If everything has been purchased, you'll want to add some more things to the list so that your guests have options of what to gift you. Also, if you register between seasons, you might want to take a look at the new inventory that is rolling out to see if you want to make any changes.

crate and barrel wedding registry, how to register for your wedding, wedding registry tips, crate and barrel, wedding planning advice

#3: Variety is good
Consider registering at more than one store so that you can give your guests a variety of places, as well as price points, to choose from. I typically recommend no more than 3 traditional registry lists to my clients. But, websites like Zola.com can help you manage all your different lists, and you can add gifts from any website, even from independent sellers on Etsy.com. Remember to register for a variety of different price points so that you can give your guests options.

#4: Create a record
While websites like Zola.com are helpful, you still want to create a record of your wedding registry with storefronts like Crate & Barrel, PotteryBarn, Belk, Bed Bath & Beyond, etc. After your wedding day, stores like this will offer couples a discount so that they can fill their home with anything they didn't get off their registry. That's right - a discount! This is why it's important to register at places where you like to shop. 

crate and barrel wedding registry, how to register for your wedding, wedding registry tips, crate and barrel, wedding planning advice

#5: Sky's the limit
There are traditional places to register, such as Crate & Barrel and PotteryBarn, or William Sonoma and Sur La Table, or Target and Bed Bath & Beyond. Then there are less traditional places to register, such as Amazon.com or Best Buy. There really isn't a right or wrong when it comes to choosing what stores to register, because each registry is going to reflect the couple! So maybe you need a new TV - register for it. Maybe you want a dining room table - register for it. Maybe you need new curtains - register for it. Your guests will want to help you fill your home, so register for the things that you need and want at the places where you plan to shop. The worst that happens is no one purchases it, and you go back afterwards and purchase with your discount and/or gift cards.

#6: Keep space in mind
A lot of couples deal with space issues when they first get married. You might be living in an apartment or condo with a small kitchen. So where do you put all your new kitchen stuff?! Well, consider that when you're registering. I'm not suggesting you register for less items because you have less space, but keep in mind the constraints of your living situation. Don't go for the big bulky appliance that will take up all your counter space and cabinet space if you don't have the room for it. Consider registering for gift cards to your favorite stores if you have space concerns so that you can purchase the items you need at a later date, once space isn't a concern anymore.

crate and barrel wedding registry, how to register for your wedding, wedding registry tips, crate and barrel, wedding planning advice

#7: Just be yourself
It can be helpful to ask friends for their help with registering, or to look at sample registry lists, with the most popular registry items. But only and your Fiance know what you need and know what will fit your lifestyle! So don't rely on others more than your gut instinct. You might need 12 place settings because you come from a large family and plan on entertaining a lot, where as your best friend might need just 6 or 8 because she has a small family and doesn't plan on entertaining much. If you don't cook a lot and don't plan on learning, then don't go crazy registering for all the little cooking tools and utensils. Get what you need, and call it a day.

In February, The Graceful Host had the opportunity to partner with Crate & Barrel to host a private event for engaged couples. If you haven't had the chance to attend one of Crate & Barrel's Private Registry Events, I encourage you to go! They host them regularly on Sunday mornings, before the store is open to the public. The event we hosted was considered Private Registry Event Plus (PRE+). The Plus events are different from the regular Private Registry Events because we brought in local vendors for an interactive experience while couples had the chance to roam the store and create their wedding registry. In addition to some amazing giveaways and door prizes, we had delicious food and beverages for couples to enjoy, free cake samples and cake decorating demonstration, live music, a calligrapher creating custom monograms for couples, a photo booth, and a florist doing bouquet and boutonniere demonstrations. It was quite a party! And it was all captured by photographer Allison Kuhn and videographer Brian Bunn. Along with all the interactive vendor stations, I created a sample styled tablescape using all Crate & Barrel products. 

crate and barrel private registry event, how to register for your wedding, creating a wedding registry, wedding registry, crate and barrel, crate wedding

Huge thanks to all our talented vendor team: Photography: Allison Kuhn Photography / Videography: Brian Bunn Films / Calligraphy: Delighted Calligraphy / Catering: Flipside Catering - Flipside Restaurant Group / Photobooth: ShutterBooth Charlotte / Cake Design: The Wow Factor Cakes / Florist: New Creations Flower Company / Live Music: Clifton Castelloe of Melonbelly / Paper Goods: Pink Toast Ink / Bridal Fashion: Nitsa's Apparel


How To Throw A Fiesta Party


Who wants to throw a fiesta?! There is no better party theme - for gatherings both big and small - than a Cinco de Mayo theme. All the vibrant colors, the energy of the holiday, and of course, the food. Tacos, anyone? Oh, and margaritas! Enough said, am I right?!

My sweet little boy, Ryan, recently turned one. (I can't believe I typed that! We have a one year old - Ekk!) So to celebrate such a big milestone, I decided to go with a fiesta party for his birthday. Pulling all the details together was so much fun! I'm sharing some of our party details so that you can also throw a fabulous fiesta birthday party - or a "just because" fiesta for Cinco de Mayo on Friday!

Fiesta first birthday party
Fiesta first birthday party invitation minted

Loved our invitations from Minted.com! They were beyond perfect. Since all our family members live out of state (and not necessarily in driving range), I sent the invitations out 2 months in advance so that everyone both near and far would have time to mark their calendars and make arrangements, if they wanted to attend. I recommend sending invitations to your guests 6 to 8 weeks in advance for parties with primarily out of town guests, and 4 to 6 weeks for parties with guests mostly located in town. I'm a big fan of snail mail, so I went with a paper invitation. Minted is my favorite for purchasing invitations online. And you can always go the custom route and use a local stationer or Etsy shop vendor. But, evites are perfectly fine for party invitations, too! Some of my favorite places for electronic invitations are Minted, Paperless Post, eVite, and Punch Bowl.

Fiesta birthday party birthday cake and cupcakes
Fiesta birthday party cactus succulent cupcakes
Fiesta birthday party iced cookies
Fiesta birthday party
Fiesta birthday party birthday cake cinco de mayo party

I was completely obsessed with the cake and cupcakes Craft Cakes CLT created for the party! She executed my vision to the T! And bonus, y'all - they taste just as good as they look! Oh, and those cookies. Holy moly. Talk about delicious! Andrea with OneChic Cookie created these yummy and beautiful cookies. There were none left by the end of the party! The adorable cake topper is a banner from Etsy shop, Ay Mujer.

Fiesta first birthday party
Fiesta birthday party
Fiesta birthday party margarita bar drink display
Fiesta birthday party

I seriously love a good margarita. So, I had to make sure we had plenty of tasty marg's for our guests. I know it's a childs birthday party, but let's face it - how many friends does a one year old have?! These early birthday celebrations are more for the parents, so don't forget to include adult beverages in addition to child friendly options. Keep scrolling to the end of this post where I'm sharing my tried and true margarita recipe!

Fiesta birthday party
Fiesta first birthday party oversized gold balloons
Fiesta birthday party
Fiesta first birthday party centerpieces
Fiesta birthday party centerpieces for cinco de mayo party

When you're planning a party, think carefully about where you place food and drinks. Your guests will tend to gravitate towards the bar and the food. So for a casual party, like this, I decided to put chips and salsa on each table so that guests had something to munch on while sitting and chatting with each other. I didn't want everyone to feel like they had to stand and eat because tacos aren't exactly a one handed food. Don't feel like you need to keep the food located in one place - spread it out amongst the party area.

Fiesta first birthday party cocktail napkins cinco de mayo
Fiesta first birthday party centerpieces cinco de mayo party
Fiesta first birthday party mini maracas
Fiesta birthday party centerpieces serape runner tablescape

It's no lie that I'm a all about the details! So when planning for this party, there was no way that I would cut corners when it came to the details. Believe it or not, this was very easy to pull together thanks to a fiesta Party Kit. Serapes, pinatas, paper banners, colorful plates and napkins - everything you need to throw a fabulous fiesta is included in this Party Kit! By the way, aren't these mini pinata's a trip? I'm obsessed! I went to good ol' Home Depot for the cactus' and succulents, and wrapped them in tissue paper. It was an easy and inexpensive way to add color to the table and stick with my fiesta theme. We gave the succulents and cactus' away to our family and friends as parting gifts, if they wanted to take them. But we did keep one cactus for ourselves as a little memory of Ryan's first birthday party, and hope to incorporate it to our garden one day so that we can tend to it together once he's older! I sprayed cans gold to hold the "viva fiesta" paper flags. Cocktail napkins are always an easy detail that gets a lot of attention. These hilarious napkins can be found in my Etsy shop.

Fiesta birthday party decor cinco de mayo inspiration
Fiesta first birthday party centerpieces
Fiesta first birthday party centerpieces cinco de mayo mini maracas

I had way too much fun planning the details of this party - can you tell?! So grateful to Paige Winn Photography for capturing all the details for me so that I didn't have to have my phone on me at all during the party!

I decided to make his smash cake myself, and it's one of my favorite recipes! Especially if you aren’t quite ready to give your kid all the processed sugar at age 1 - it’s gluten free, grain free and paleo friendly. And if there is any doubt as to whether or not Ryan loved his first taste of cake, just keep scrolling down! (Spoiler: He demolished it! And it was the greatest thing I've ever witnessed!)

Fiesta first birthday party smash cake
Fiesta first birthday party
Fiesta first birthday party smash cake


Okay, so now for the good stuff - the margaritas! This is the recipe I used for the party, and it's my overall go to for a refreshing cocktail that is easy to make.

The Perfect Margarita
- 2 oz Silver Tequila (whatever brand! I prefer silver over gold)
- 1 oz Triple Sec/Cointreau
- 1-2 oz Lime Juice (basically, 1 medium lime)
- Garnish with sliced jalapeño peppers and/or cilantro for extra flavor

IMG_2132.JPG

Happy Cinco de Mayo, y'all!

XO,
A.

For more information about the Party Kits, visit this page


Mother's Day Gift Guide: For All The Moms In Your Life


There's no doubt that Mom's are the glue that hold our lives together. Your Mom always knows how to make you feel better, how to solve your problems, and how to make you feel extra special. Celebrate all the Moms in your life on May 14th - and maybe even cement your place as the favorite! - with this Mother's Day gift guide!

For the Mom who, is a new Mom
New moms are very sentimental. (Maybe it's all the hormones?!) Gift something full of meaning, like a necklace with baby’s initials, birthdate, or thumb print, like this one!

via Loveprint, Style #115SE

via Loveprint, Style #115SE

For the Mom who, is a new Grandmother
Fact: Moms love photos - especially photos of their Grand-babies! You can create these photo books through ChatBooks, which pulls photos from your cellphone, Instagram, Facebook, or through good ol' fashion uploading. There is no formatting required. Not only are the books easy to make, but they're affordable. In fact, your first book is free!

For the mom who, lives far away
Map it out! There may be distance between you and your Mom, but with something like this map artwork, it'll seem like she's right next door.

via Etsy

via Etsy

For the Mom who, just seems to do it all
Pampering is always appreciated by Moms. Consider gifting your Mom a mani/pedi, or a relaxing day at the spa!

For the Mom who, loves to be active
The gift of fitness goes a long way! For Moms who love to be active, gift them a subscription to ClassPass - a service that allows you to try different types of fitness classes, at various studios, in their city. She can go to a spin class one day, then to aerial yoga the next!

For the Mom who, is on the go
A fancy water bottle makes drinking water all day long so much better, am I right?! If your Mom is a busy bee, this gift will be a welcomed companion.

For the Mom who, is super organized
This daily planner will help Mom put herself back on the list. It serves as a planner - which will be helpful for those task-oriented Mommas - but it also incorporates both daily and weekly exercises, aimed to help you reflect on what brings you joy, and focus on making it a habit. 

For the Mom who, is a total techie
Dig up old video clips and/or photos, and create something to show Mom just how much you care about her. She'll cherish the memories and walk down memory lane!

For the Mom who, is a foodie
Technically, I think the "rule" of Mother's Day is that Mom doesn't have to cook. But, you might want to ignore that, and gift her a culinary experience for just the two of you, or maybe the whole family. Take a cooking class together and learn something new, while making memories. (If you're local to Charlotte, you have to try Chef Alyssa's Kitchen!)

For the Mom who, is impossible to buy for
Nothing makes a Mom happier than photos of her children (and Grandchildren!). Consider gifting your mom a photo session with a professional photographer. Come on, when was the last time you took a photo with a real camera and not your iPhone?! Get the family together and capture some memories - your Mom will love this gift!

For the Mom who, is a wine lover
Moms sure do love their wine, don't they? Well, there's a reason for that. Make happy hours a bit fancier. This ice mold from Crate & Barrel can freeze as is, or incorporate berries, citrus slices or fresh flowers before being frozen.

For the Mom who, likes everything to be in it's place
Help mom organize all those macaroni necklaces she's still holding on to with a bright and beautiful lacquer box, like this one from Lilly Pulitzer

via Lilly Pulitzer

via Lilly Pulitzer

Buying Guide Links
Expanding upon each post above, here are links to more products for some of the different mom "types"!
New Mom: ONE | TWO | THREE  // New Grandmother: ONE | TWO  // Lives Far Away: ONE | TWO  // Active: ONE // 
On The Go: ONE | TWO | THREE // Organized: ONE | TWO | THREE // Foodie: ONE | TWO // Wine Lover: ONE | TWO | THREE //
Likes Everything In It's Place: ONE | TWO | THREE

xo,
A.


How To Create A Centerpiece Using Grocery Store Flowers

 
how to create a centerpiece using grocery store flowers from trader joe's

Everyone has asked themselves the question: "What would I do if I had endless amounts of money??" You probably thought about little luxuries to splurge on like a personal chef to cook all your meals, or a housekeeper that cleans every day. While I wouldn't say no to either of those things, I love the idea of having fresh flowers in my house all the time. It just makes a home feel like a home - and a bit fancy! But, we don't need to wait to win the lottery in order to have beautiful flower arrangements in our home on a regular basis. Anyone can create a flower arrangement for under $30 - even with grocery store flowers from Trader Joe's! I'll show you how.

Trader Joe's always has the best flowers, so it's my go-to for fresh blooms. But the farmer's market is also an amazing place to find gorgeous flower from local growers. So, hunt for the best place in town. Know what vase you're planning to use before you purchase flowers. That way you know you will have enough to work with - or on the flip side, not have a whole bunch of left overs. My floral style tends to be more organic and textured. I was looking for flowers with natural lines, and tulips are perfect for that! Hyacinth was my go to for a little color contrast and texture.

flower arrangement using grocery store flowers from Trader Joe's
creating flower arrangements using grocery store flowers from Trader Joe's

Once you purchase your flowers, you'll need to process them them. This basically means that you will want to prep the flowers for being arranged. Be sure to stick the flowers in water after you get home - especially if you don't plan on arranging them right away. You'll want to cut each stem on an angle. This helps the extend the life of the flower because it can drink water better. You'll also want to remove any leaves and stems that might go into the water. Not only will this also help extend the life of your arrangement, but it'll create more space in the vase for your stems - which you will need! Put some water in the vase before you begin, and don't forget the flower food. I like to start with some greenery and the larger blooms first, adding in just a few pieces at a time to create a base.

Next, you will layer in the other blooms and start to create your shape. You can take stems out after you put them in! This is your arrangement, so edit as you go until you're happy with the look.

Depending on where you plan to display your masterpiece, you can either make a one-sided bouquet or one that can be viewed from all sides. Mine is going on my kitchen table, so I made an arrangement that can be viewed from any angle. And as you can see I did this on my kitchen counter, so you don't need a fancy work space or tools. Just a good pair of scissors! All in all this arrangement took me roughly 30 to 40 minutes to create, from the start of processing the flowers to filling up the vase with water after my last edit. It was the perfect creative project to do during naptime! 

And here is my final arrangement!

how to create a centerpiece using grocery store flowers from trader joe's

Oh, and in case you were wondering, this floral arrangement is cat approved!


XO,
A.


2016: Year In Review


It's hard to believe we are about to say goodbye to 2016 and welcome in 2017! Each year, I like to take a look back to see all the celebrations and milestones of The Graceful Host. This year was unlike any other. We had the pleasure of working with some amazing couples and talented vendors over the past 12 months. We visited old, familiar places and new places, made some incredible memories, and continued learning and sharing. Here is a peek into the year that was!

We kicked off the year with Meg + Heyward for a winter wedding celebration at the Bride's family's home. (iPhone snaps by me)

Then a few weeks later we celebrated an amazing couple at the Mint Museum Uptown with a serious wow-factor winter wedding for Katie + Kyle. These two know how to party, let me tell you! View the full gallery, here. (photography by Crystal Stokes Photography)

In March, we celebrated a very special couple. Melanie, the talented florist behind New Creations Flower Company, got married! It was an honor to help one of our own on her big day! View the full gallery, here. (photography by Lauren Rosenau Photography)

Lauren + Andrew's wedding will always hold a special place in my heart. I was due the day before their wedding. It was so important to me that I be able to be there (I've never missed a wedding!), and by some miracle that wish was granted. Though, I was 40 weeks and 1 day pregnant, everything went off without a hitch. And it is all thanks to my awesome team and to this amazing family who never once questioned our dedication to making April 2, 2016 the best day ever! View the full gallery, here. (photography by Julia Laible Photography)

At the end of April, we celebrated Angela + Charlie in a cherry blossom inspired affair at the always lovely Foundation For The Carolinas that will just make you blush ... get it?! ;) Full gallery coming to the blog soon! (photography by Lauren Rosenau Photography)

We headed to beautiful Boxwood Estate to celebrate Brittany + Josh in a glamorous, pastel summer wedding full of heart! Full gallery coming to the blog soon! (photography by Finch and Farrow Photography)

In June, we were back at the gorgeous Mint Museum Uptown to celebrate Jana + Jordan with an elegant and sweet Uptown wedding that was an absolute blast! Full gallery coming to the blog soon! (photography by Crystal Stokes Photography)

We packed up the car and headed 4 hours West to Andrews, North Carolina (just outside of Asheville) to the breathtaking Hawkesdene House to celebrate Jessica + Ryan's vibrant fall wedding. Full gallery coming to the blog soon! (photography by J.Jones Photography)

We were honored to see our work published in some of the most recognizable blogs and magazines in the nation and in the Southeast. Here is a recap of our TWENTY-SIX press features in 2016


As you can see, we were very busy in 2016! And we have so many weddings to share with your over the next few months. 


But by far, the biggest accomplishment and change of all, was the birth of our son, Ryan Elliott Cash. He came into the world on April 6, 2016 and our lives were forever enriched for the better. We are blessed to have a healthy, happy baby boy who is so curious, sweet, and has never met a stranger. He keeps us on our toes and is constantly on the move! Ryan has been the best part of the day for the past 38 weeks. Running a business and being a mom is hard work. (I'm in no way exaggerating.) I had no idea what to expect, and if I'm honest, I was terrified of the balancing act. Having Ryan has actually helped me in my business. I don't always do things right, or know all the answers - every day I'm learning. But it's made me much more intentional with my time and with my clients. We continue to only take a select few weddings each year so that I can serve my couples the way my heart desires. It's helped me focus on what matters most in my professional and personal life. It's been 8.5 months of adventure with our sweet boy, and I can't wait to see all that 2017 will bring our little family.

photography by Brian Schindler Photography

photography by Brian Schindler Photography

I'm so grateful for all the couples I've had the pleasure of getting to know, for all the celebrations that we have been a part of, and for all the talented vendors that we've had the chance to work with and collaborate with in 2016. Thank you to each of our couples for trusting us to plan and produce your special day. It's a honor that I do not take for granted!

And while 2016 was amazing, I'm looking forward to all the excitement of what is yet to come in the year 2017. I have no doubt it will be incredible in it's own special way. I wish each of you a happy and healthy 2017! I hope the promise of a new year and new beginnings brings you peace and hope. 

XO,
A.